
Introduction to Cast Iron Apple Crisp
When the leaves begin to change and the air gets crisper, nothing quite says “fall” like a warm cast iron apple crisp. This delightful dessert is not just about taste; it’s also steeped in nostalgia and simplicity. The beauty of using a cast iron skillet is its ability to evenly distribute heat, ensuring that every apple becomes beautifully tender and the topping turns perfectly golden and crispy.
Why Choose a Cast Iron Apple Crisp?
- Flavor Enhancement: Cooking in cast iron enhances flavors, bringing a rich depth to your apple filling that you just can’t replicate in other bakeware.
- Versatility: You can serve it straight from the skillet, making for an impressive presentation and saving on additional dishwashing.
- Durability: Cast iron skillets are incredibly durable and can last a lifetime with the proper care. If you’re interested in investing in kitchenware, check out The Kitchn’s guide to cast iron care.
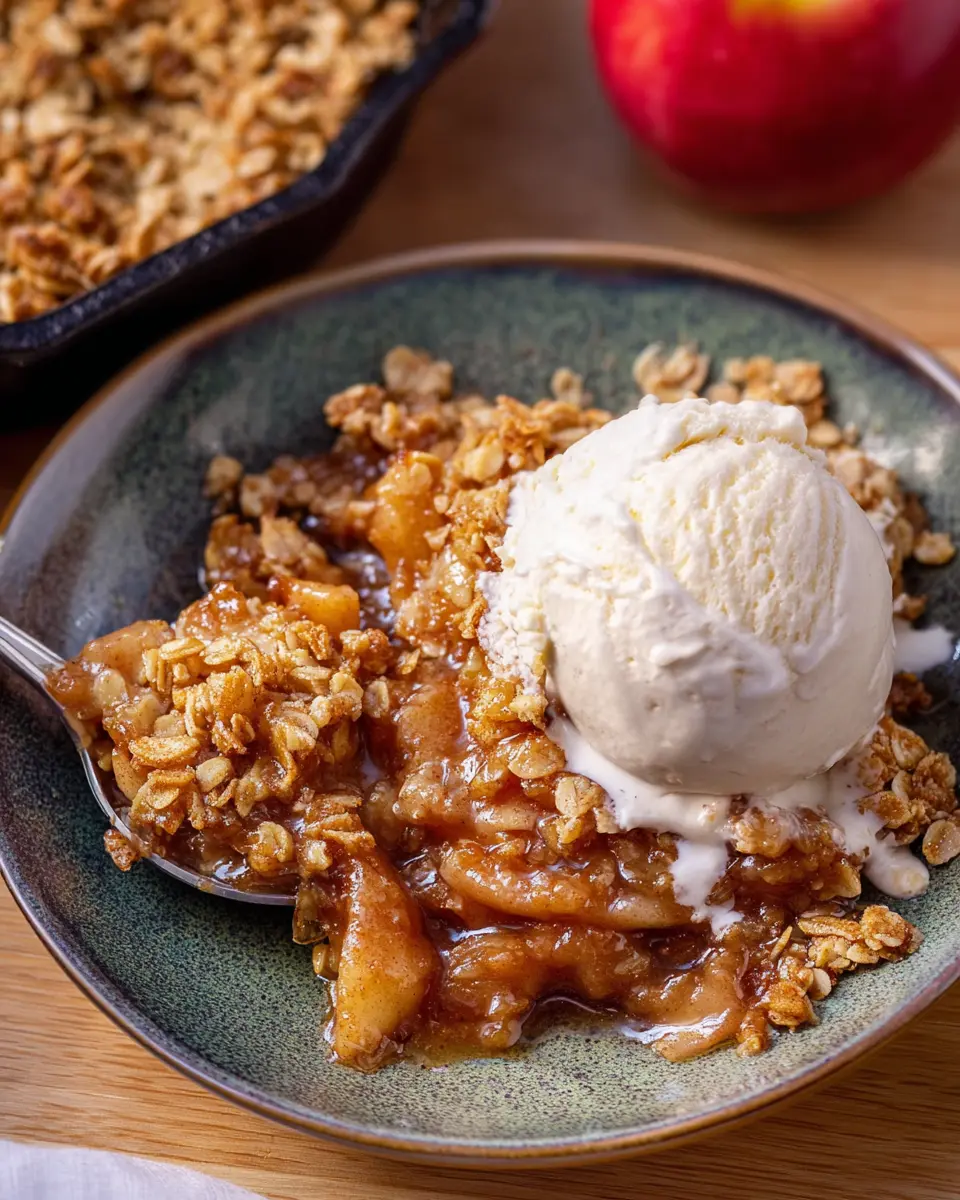
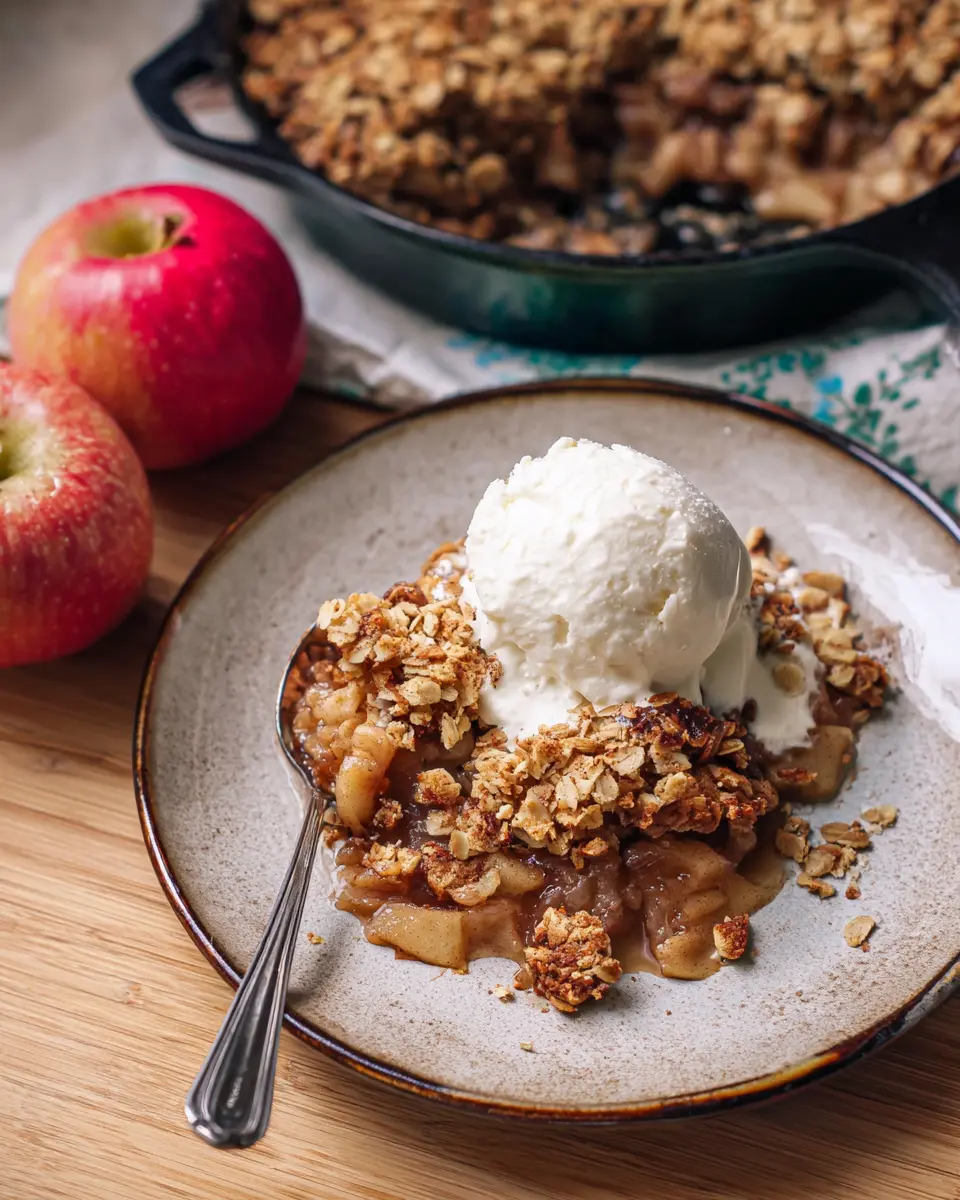
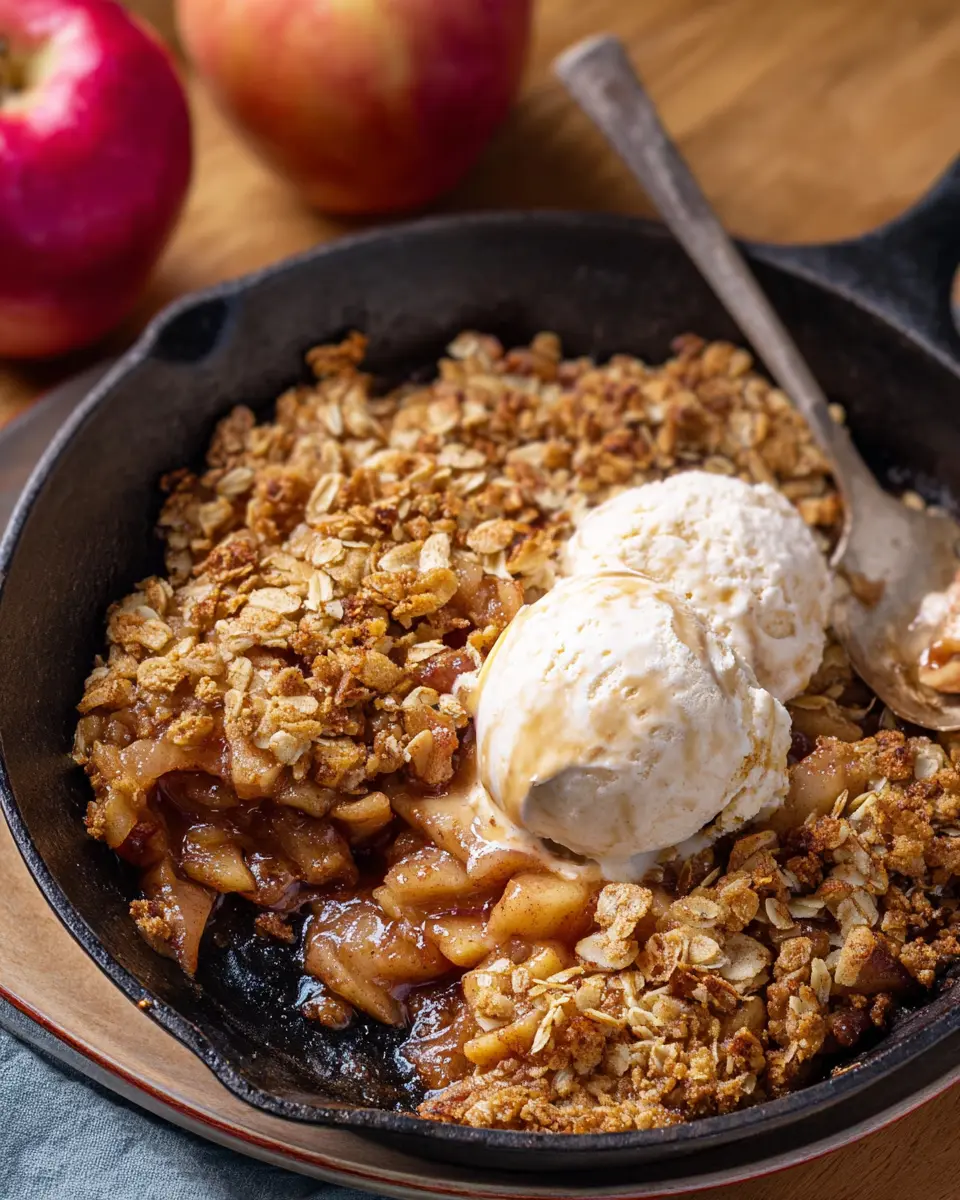
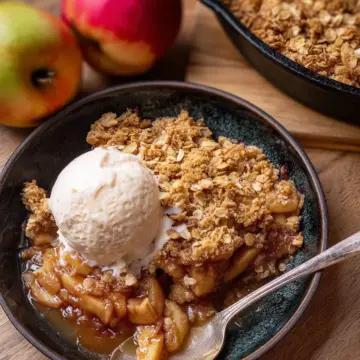
Whether you're gathering friends for a cozy evening or enjoying a quiet night in, this cast iron apple crisp is perfect for indulging your sweet tooth. Top it off with a scoop of ice cream or a dollop of whipped cream, and you're in for a treat that celebrates the season. Trust me; your home will smell heavenly!
Ingredients for Cast Iron Apple Crisp
Creating the perfect cast iron apple crisp starts with gathering the right ingredients. This simple recipe showcases a delightful blend of sweet and tart flavors from fresh apples, topped with a crunchy, hearty oatmeal crisp.
Filling Ingredients
For the filling, you’ll need:
- 6 medium apples: Choose varieties like Cortland, Honey Crisp, or Granny Smith for a delightful mix of sweetness and tartness.
- 3 tablespoons unsalted butter: Adds richness and helps the apples soften beautifully.
- ⅓ cup brown sugar: This gives a sweet caramelized flavor.
- 2 teaspoons ground cinnamon: A warm, comforting spice.
- ⅛ teaspoon kosher salt: Enhances the overall flavor.
Topping Ingredients
For the crunchy topping, gather:
- 1 ¼ cup old-fashioned oats: For that classic oat crisp texture.
- 2 tablespoons all-purpose flour: Helps bind the topping.
- 5 tablespoons cold unsalted butter: Should be cut into pieces, providing flakiness.
- ⅓ cup brown sugar: For sweetness that balances the tart apples.
- ⅛ teaspoon kosher salt: A pinch to cut through the sweetness.
- Sprinkle of ground cinnamon: For an aromatic finish.
With these ingredients, you’re well on your way to making a delightful cast iron apple crisp that’s sure to impress! For helpful tips on selecting the best apples, check out this guide here.
Preparing Cast Iron Apple Crisp
Making a delicious cast iron apple crisp is not only a fun kitchen project but also a great way to enjoy the bounty of fall apples. Follow these simple steps to create a warm, comforting dessert that your friends and family will love.
Step 1: Preheat the oven and prepare the apples
Start your crisp journey by preheating your oven to 350°F. While that's warming up, grab about six medium apples—cortland, honey crisp, or granny smith work perfectly—and peel, core, and cut them into bite-sized pieces. Place them in a large mixing bowl and let them hang out while you prepare the filling.
Pro tip: To speed up the peeling process, consider using an apple peeler, or even slicing the apples in a food processor! For more tips on apple varieties, check out this helpful apple guide.
Step 2: Make the filling mixture
Next, place a 10-inch cast iron skillet on medium-low heat. Add 3 tablespoons of unsalted butter and let it melt. Once melted, whisk in ⅓ cup of brown sugar, 2 teaspoons of ground cinnamon, and a pinch of salt. This mixture will add a warm, caramel flavor to your apples.
Pour this buttery delight over the apple chunks and toss them so that each piece gets coated. After that, put the apple and butter mixture back into the skillet and increase the heat to medium. Allow it to cook for about five minutes. You'll notice the apples start to soften. Once that's done, it’s time to take the skillet off the heat!
Step 3: Cook the apple filling
Keeping the apple mixture in the skillet, let it sit for just a moment. This allows the butter and sugars to meld into the apples, enhancing their flavor.
Step 4: Prepare and mix the topping
In a separate bowl, gather your topping ingredients: 1 ¼ cups of old-fashioned oats, 2 tablespoons of flour, 5 tablespoons of cold unsalted butter, ⅓ cup of brown sugar, and a sprinkle of cinnamon. Use your hands or a pastry cutter to mix them together. Don’t worry if you see small lumps of butter; that’s what’ll make your topping deliciously crunchy!
Step 5: Combine and bake
Now, you’ll want to distribute the topping evenly over the apple mixture in the skillet. Make sure to sprinkle a bit more cinnamon on top for that extra touch. Bake the whole thing in your preheated oven for about 35-40 minutes until the crisp is golden and the apples are bubbling.
Let the cast iron apple crisp cool for about 30 minutes before you dig in. This resting time allows the flavors to settle and gives you a perfect slice! Serve it up with a scoop of ice cream or a dollop of whipped cream for an indulgent treat that’s sure to impress. Happy baking!
Variations on Cast Iron Apple Crisp
Gluten-free options
If you're looking to make a delicious gluten-free cast iron apple crisp, consider substituting the all-purpose flour in the topping with a gluten-free blend or almond flour. You can also use certified gluten-free oats to keep the dish safe for those with sensitivities. It’s an easy way to enjoy dessert without compromising taste!
Add-ins and flavor twists
Feel free to customize your apple crisp experience! Adding chopped nuts, such as walnuts or pecans, can provide a satisfying crunch. For a flavor twist, mix in dried cranberries or raisins, or even a splash of vanilla extract for extra depth. Some like to sprinkle in a bit of nutmeg or swap out the traditional apple filling for pears or peaches. These little extras can elevate your cast iron apple crisp to a whole new level!
For more natural ingredient ideas, check out this great resource on substitutions.
Cooking Tips and Notes for Cast Iron Apple Crisp
Ingredient Substitutions
Feel free to get creative with your cast iron apple crisp! Instead of using brown sugar, you can swap it with coconut sugar for a healthier sweetener. If you’re out of old-fashioned oats, consider using almond flour or crushed graham crackers for a different texture. Additionally, if you don’t have apples on hand, pears make a lovely alternative — just keep in mind the cooking time may vary slightly.
Prepping in Advance
Make your baking experience smoother by prepping your ingredients in advance. You can peel and slice the apples a day ahead and store them in the refrigerator with a squeeze of lemon juice to prevent browning. Mixing the topping can also be done ahead of time; just keep it refrigerated until you’re ready to bake. Enjoy the process and make it a family affair!
For more tips on prepping fruit, check out this helpful guide.
Serving suggestions for Cast Iron Apple Crisp
Ice Cream and Whipped Cream
Nothing elevates a warm cast iron apple crisp quite like a generous scoop of vanilla ice cream or a dollop of freshly whipped cream. The contrast of hot fruit and cold creaminess creates a delightful experience. Consider trying flavors like caramel or cinnamon ice cream for an extra twist! If you’re feeling adventurous, mix in some chopped pecans or a sprinkle of nutmeg for added texture and flavor.
Pairing with Beverages
When it comes to beverages, consider pairing your cast iron apple crisp with a steaming cup of chai tea or a comforting spiced cider. Both options complement the warm spices in the crisp beautifully. Alternatively, a refreshing sparkling water can cleanse your palate between bites, leaving you ready for more of that delicious dessert! For a special touch, try offering a homemade vanilla cream soda as a fun holiday treat.
By exploring these serving suggestions, you'll take your cast iron apple crisp to the next level, ensuring a memorable dessert experience for you and your guests!
Time Breakdown for Cast Iron Apple Crisp
Preparation Time
Preparing your cast iron apple crisp is a breeze! You’ll need about 10 minutes to peel, core, and slice the apples, and to get your filling and topping ready.
Cooking Time
Once you’ve prepped everything, the cooking magic happens. Bake the crisp in the oven for about 40 minutes, allowing those delightful flavors to meld and the topping to achieve its crunchy perfection.
Total Time
In total, you’re looking at about 1 hour and 20 minutes from start to finish. This includes a 30-minute resting period, ensuring your crisp is just the right temperature to dive into after baking. Perfect for sharing with friends or indulging after a long day!
With this clear breakdown, you’ll know exactly how to fit the cast iron apple crisp into your busy schedule. For more tips on timing and apple varieties, check out resources from The U.S. Apple Association or Epicurious. Happy baking!
Nutritional Facts for Cast Iron Apple Crisp
Calories
A serving of cast iron apple crisp offers approximately 230 calories. This delightful dessert will satisfy your sweet cravings without derailing your diet.
Carbohydrates
Each serving contains around 37 grams of carbohydrates, primarily from the apples and oats, providing a natural source of energy that’s perfect for fueling your day.
Dietary Fiber
With about 3 grams of dietary fiber per serving, this dessert not only indulges your sweet tooth but also contributes to your daily fiber intake, aiding in digestion and keeping you feeling full longer.
For more nutritional insights, you can check resources like the USDA FoodData Central for detailed breakdowns of specific ingredients. Are you ready to savor this warm, comforting dessert?
FAQs about Cast Iron Apple Crisp
Can I make apple crisp ahead of time?
Absolutely! You can prepare your cast iron apple crisp filling and topping separately in advance. Just store the apple mix in the fridge and cover the topping in an airtight container. When you’re ready to bake, combine them in your cast iron skillet and pop it in the oven. Alternatively, you can bake it in advance, let it cool, and reheat it when you’re ready to enjoy.
What kinds of apples are best?
For a delightful cast iron apple crisp, choose firm apples with a balance of sweetness and tartness. Varieties like Honeycrisp, Granny Smith, and Braeburn work wonderfully. These apples hold their shape while baking, ensuring you get that perfect texture paired with a cozy, spiced flavor.
How do I store leftovers?
To keep your apple crisp fresh, store leftovers in an airtight container in the fridge for up to five days. You can also freeze it, but for best results, eat it within three months. Reheat it gently in the oven or microwave for that just-baked taste. Enjoy!
Conclusion on Cast Iron Apple Crisp
In conclusion, our cast iron apple crisp is a delightful way to celebrate apple season. With its buttery oat topping and tender apple filling, it promises a comforting experience. Perfect for gatherings or cozy nights in, this dish pairs wonderfully with a scoop of ice cream. Enjoy the warmth!
Cast Iron Apple Crisp
Equipment
- Cast Iron Skillet
Ingredients
Filling
- 6 medium apples, peeled, cored, and cut into small pieces
- 3 tablespoons unsalted butter
- ⅓ cup brown sugar
- 2 teaspoons ground cinnamon
- ⅛ teaspoon Diamond Crystal kosher salt
Topping
- 1 ¼ cup old fashioned oats
- 2 tablespoons all purpose flour
- 5 tablespoons cold unsalted butter, cut into 5 pieces
- ⅓ cup brown sugar
- ⅛ teaspoon Diamond Crystal kosher salt
- Sprinkle ground cinnamon
Instructions
Prepping the Apples
- Preheat the oven to 350F.
- Add the cut up, peeled and cored apple slices to a large mixing bowl and set aside.
Make the Filling
- Preheat a 10 inch cast iron skillet over medium low heat and melt the butter for the filling.
- Once the butter is melted, whisk in the brown sugar, cinnamon, and salt.
- Pour the butter mixture over the apples in the mixing bowl and toss until the apples are well coated.
- Add the apples and butter mixture back into the skillet and turn the heat up to medium. Stir occasionally while it cooks for 5 minutes, until the apples begin to soften. Remove the pan from the heat, but keep the apple mixture in it.
- After the apples are partially cooked, cut the 5 tablespoons of butter into 5 separate pieces.
Make the Topping
- Add all the toppings EXCEPT the ground cinnamon into a medium mixing bowl. Combine ingredients using either your hands or a pastry cutter. It is okay to have small lumps of butter throughout the mixture.
- Top the apples in the skillet with the topping evenly and sprinkle on the cinnamon. Place in the oven.
Bake
- Cook for 35-40 minutes, until the apples are tender, slightly bubbling, and the topping is crunchy.
- Allow to rest and cool at room temperature for about 30 minutes before serving.


Leave a Reply