
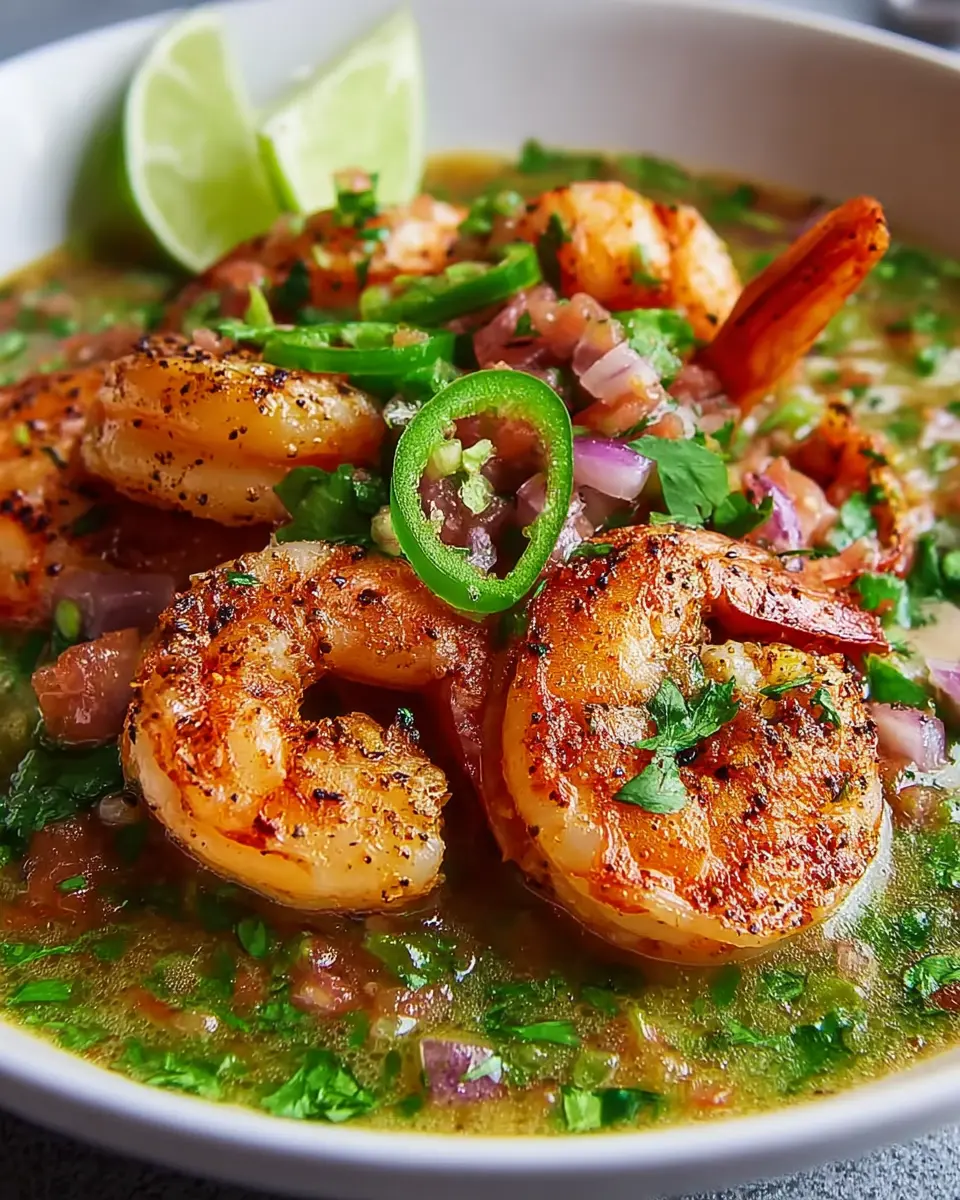
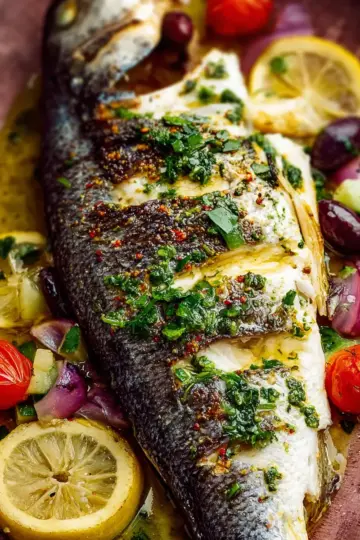
Introduction to Shrimps in Culichi Salsa
If you’re looking to add a burst of flavor to your dinner table, Shrimps in Culichi Salsa might just be your new favorite dish! This delightful recipe celebrates the vibrant taste of Mexico while being lighter and healthier than traditional versions.
Why Shrimps in Culichi Salsa is Your New Favorite Dish?
Imagine sinking juicy grilled prawns into a creamy green salsa made from ripe avocados and roasted chili peppers. Not only does this dish deliver a symphony of flavors, but it also keeps things light by swapping out heavy creams for plant-based alternatives like coconut yogurt. The result? A dairy-free, healthier version of classic Culichi Salsa that boasts a mere 225 calories per serving.
Avocado is not just a delicious ingredient; it’s also packed with heart-healthy omega-3 fats and adds a beautiful green hue to the sauce. Plus, this version is gluten-free and suitable for those on a paleo or keto diet, making it perfect for various dietary preferences.
Whether enjoyed as an appetizer or a main course paired with rice or tortillas, Shrimps in Culichi Salsa is versatile and sure to impress. Curious about discovering more about the nuances of Mexican cuisine? Check out this article on authentic Mexican flavors!
Ingredients for Shrimps in Culichi Salsa
Essential ingredients for a delightful salsa
To whip up a vibrant Culichi salsa, you’ll need a few key ingredients that come together to create a creamy, incredibly flavorful sauce. Here’s what you’ll need:
- 4 Poblano green chilli peppers: These provide a mild yet rich flavor.
- 2 Serrano green chilli peppers: For a little extra heat!
- 4 Garlic cloves: Enhances the depth of the salsa.
- 40 g Spring onion: Adds a fresh, oniony crunch.
- 1 tablespoon Extra virgin olive oil: For roasting the veggies.
- 100 g Coconut yogurt: A dairy-free alternative that lends creaminess.
- 1 Avocado (¼ juiced lime): Adds richness and a lovely green hue.
- 1 tablespoon Fresh cilantro: For that fresh, herbal brightness.
These ingredients not only boast amazing flavors, but they also bring a wealth of nutrients to your dish.
Fresh shrimps: key to the perfect dish
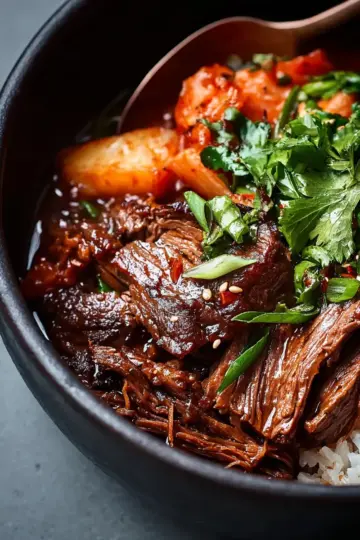
Of course, no Shrimps in Culichi Salsa would be complete without the star of the show: 200 g fresh shrimps. Opting for fresh or sustainably sourced shrimp ensures you get the best texture and flavor. When cooked quickly, shrimps become tender and juicy, perfectly complementing your zesty salsa. For the best results, make sure to devein them and pat them dry before cooking for an even sear.
So, gather your ingredients and let's get started on this mouthwatering dish! If you’re interested in learning more about the health benefits of shrimp, check out resources from the American Heart Association.
Preparing Shrimps in Culichi Salsa
Creating a delicious plate of Shrimps in Culichi Salsa is an experience that combines both culinary skill and the love of vibrant flavors. As you embark on this cooking adventure, follow these simple steps for a delightful meal that celebrates the essence of Mexican cuisine. Let’s dive into the details.
Roast the Green Chilies and Garlic
The first step to achieving a tasty Culichi Salsa is to infuse flavors through roasting. Begin by chopping your green chilies, garlic, and spring onions. Spread them out on a roasting tray and drizzle with a bit of extra virgin olive oil. Season lightly with salt and pepper, as this will enhance their natural sweetness as they roast. Bake in a preheated oven at 180°C (355°F) for about 15 minutes, tossing them halfway through for even cooking. You'll know they're ready when they have a beautiful golden hue and a lovely smoky aroma that fills your kitchen.
Blend the Salsa Ingredients
Next, it’s time to transform your roasted ingredients into a creamy, luscious salsa. Transfer them into a food processor and add in the coconut yogurt, ripe avocado, freshly squeezed lime juice, and chopped cilantro. These ingredients will create the unique creamy texture that is a hallmark of a good Culichi salsa. Don’t forget to add a splash of water if needed, as this helps achieve the right consistency. Blitz everything until you have a smooth, vibrant sauce that will coat the shrimp beautifully.
Pan-Fry the Shrimps
Now for the main event: the shrimps! Heat a non-stick skillet over medium-high heat and add a touch of oil. Once the oil is heated, toss in your shrimps, cooking them for just two to three minutes or until they turn a beautiful pink color. Be cautious not to overcook them, as they can become rubbery and lose their appealing texture. Once cooked, remove them from the heat and let them rest briefly.
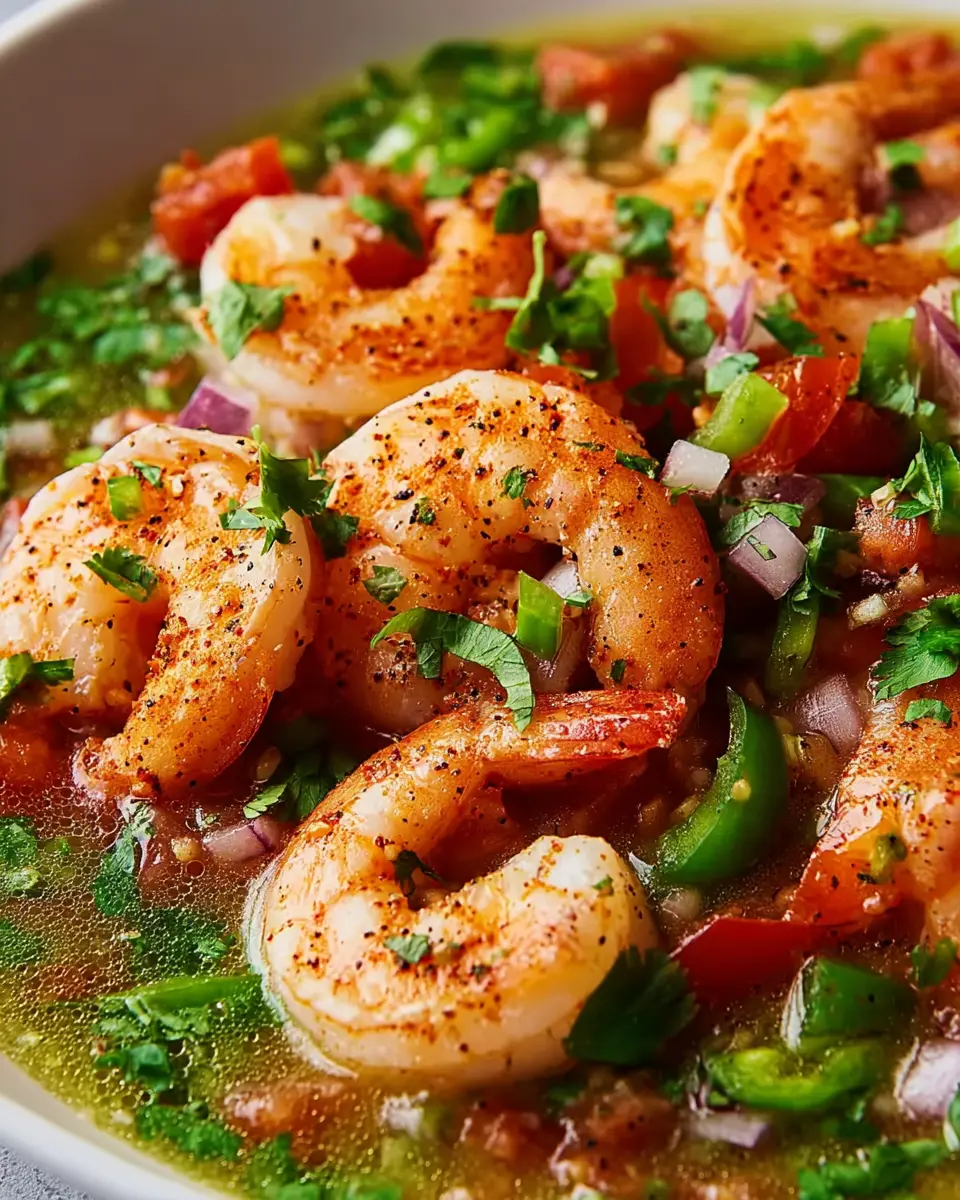
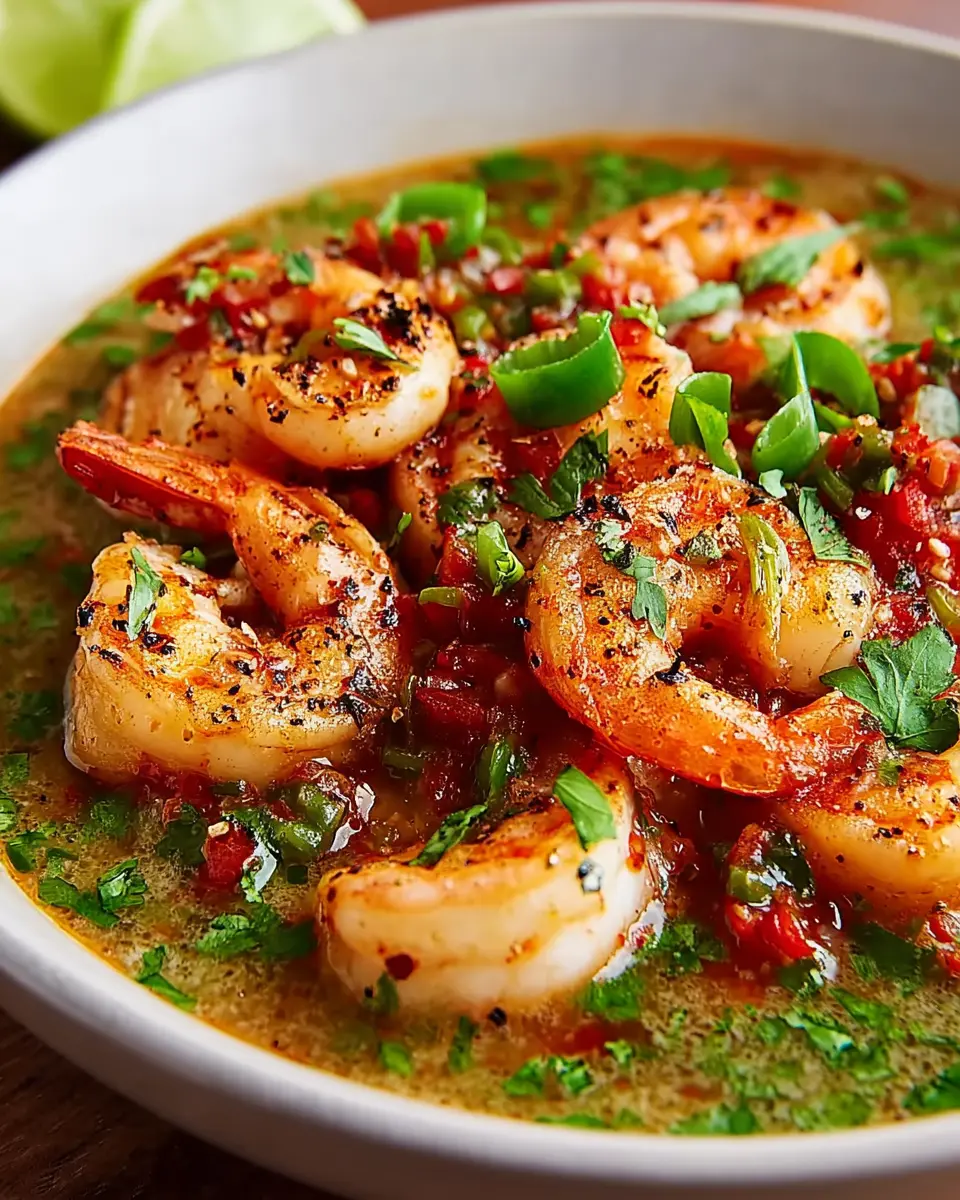
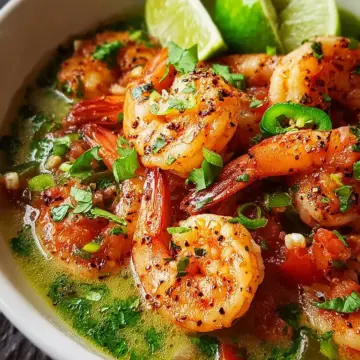
Combine and Serve!
Finally, it’s time to bring everything together. In a serving dish, arrange the sautéed shrimps and generously drizzle the Culichi salsa over the top. This colorful presentation is not only inviting but also promises a burst of flavor in each bite. You can serve the dish as an elegant starter or part of a main course with rice or warm tortillas.
Enjoy this delightful dish with friends or family, maybe while chatting about your favorite Mexican foods. By preparing Shrimps in Culichi Salsa, you're not only treating yourself to a meal that’s rich in flavor, but you’re also embracing a healthier, dairy-free option without sacrificing taste. Happy cooking!
Variations on Shrimps in Culichi Salsa
Adding vegetables for extra crunch
Enhance your Shrimps in Culichi Salsa by tossing in some vibrant veggies! Consider incorporating diced bell peppers, grated carrots, or sliced radishes for that delightful texture contrast. Not only do they add crunch, but these veggies also boost the nutritional profile of your dish, making it even more wholesome.
Trying different types of seafood
Feeling adventurous? Swap out shrimps for other seafood options like scallops or even fish fillets. Grilled or sautéed, these alternatives can soak up the rich, creamy culichi salsa beautifully. You could also try a medley, blending shrimp with mussels or calamari, enhancing the flavor and variety on your plate. For more inspiration, check out this seafood guide.
Cooking tips and notes for Shrimps in Culichi Salsa
Keeping your shrimps juicy
To ensure your shrimps in Culichi salsa are succulent and not overcooked, pay attention to cooking times. Sauté the shrimps in a non-stick skillet for just 2 to 3 minutes until they turn pink. If they start curling tightly, it’s a sign they’re done! Remember, they’ll continue cooking after you remove them from the heat, so trust your instincts.
Perfecting the salsa texture
A smooth and creamy texture is key for your salsa. When blending the ingredients, start with ripe avocado and coconut yogurt, adding a splash of water as needed to achieve the desired consistency. Don’t hesitate to customize the spice level by adjusting the number of roasted chilies. For a more vibrant flavor, consider adding lime juice incrementally until you reach your preferred zing!
For more insights, check out these salsa-making tips.
Serving suggestions for Shrimps in Culichi Salsa
Pairing with Rice or Tortillas
To elevate your Shrimps in Culichi Salsa, consider pairing them with a bed of fluffy rice or warm tortillas. The creamy, vibrant salsa complements the mildness of rice, offering a balanced bite. If you prefer a bit of crunch, soft corn or flour tortillas can be the perfect vessel for each delicious morsel. Simply scoop a few shrimps and salsa into tortilla halves, and you’ve got yourself a delightful handheld treat.
Making it a Burrito Feast
Want to take your meal to the next level? Turn your Shrimps in Culichi Salsa into a festive burrito feast! Start by layering seasoned rice in a large tortilla, followed by those succulent shrimps. Drizzle generously with the Culichi salsa and perhaps toss in some fresh veggies or beans for added texture. Roll it up, and you’ve got a satisfying, portable meal that’s perfect for lunch or dinner. Explore more ideas on how to customize your burrito on Tortilla Channel.
Time breakdown for Shrimps in Culichi Salsa
Preparation time
Get your kitchen prepped in just 10 minutes! Start by chopping the green chillies, garlic, and spring onions. This quick step will help set the stage for the vibrant flavors to come in your Shrimps in Culichi Salsa.
Cooking time
The actual cooking takes about 15 minutes. With a few minutes to roast and just a couple to sauté the shrimp, you’ll find that this dish comes together effortlessly, allowing you to enjoy a delicious meal without the stress.
Total time
All in all, you’re looking at 25 minutes from start to finish. Perfect for a weeknight dinner or an impressive gathering, Shrimps in Culichi Salsa is as quick as it is flavorful!
Feeling ready? Let's dive into this scrumptious recipe! For more culinary inspiration, check out our Mexican cuisine section for delightful dishes that are sure to impress.
Nutritional Facts for Shrimps in Culichi Salsa
Calories per Serving
Each serving of Shrimps in Culichi Salsa contains approximately 231 calories. This makes it a lighter option compared to traditional recipes, perfect for those looking to maintain a healthy diet without sacrificing flavor.
Nutrients Included
This dish is not just low in calories; it’s also packed with essential nutrients. With the creamy goodness of avocado and the freshness of cilantro, you're getting a nutrient boost that includes:
- Healthy fats from avocado, offering insights into heart health.
- Vitamins and minerals from the fresh ingredients, such as vitamin C and potassium.
Enjoy this delightful and nutritious seafood dish knowing it's both satisfying and beneficial for your well-being! For a deeper dive into the health benefits of shrimp, explore this FDA seafood nutrition resource.
FAQs about Shrimps in Culichi Salsa
What greens can I use in the salsa?
In this Shrimps in Culichi Salsa recipe, you can use roasted poblano and serrano peppers for that authentic kick. If those aren't available, feel free to substitute them with green bell peppers and jalapeños for varied flavors. The key is to achieve a balance of creaminess and spice, so choose what works best for your palate!
How to store leftovers?
Leftovers of this delightful dish can be stored in a sealed container in the fridge for up to two days. However, to keep the flavors intact, it’s best to avoid reheating the salsa. Instead, warm the shrimps separately and pair them with the cold salsa for a refreshing meal.
Can I make this dish gluten-free?
Absolutely! Our Shrimps in Culichi Salsa recipe is naturally gluten-free. Just ensure that any additional ingredients you might pair it with, like tortillas or rice, are confirmed to be gluten-free. This way, everyone can enjoy this mouthwatering dish without worry!
Conclusion on Shrimps in Culichi Salsa
In summary, Shrimps in Culichi Salsa provide a delightful twist on a classic Mexican dish. The creamy, vibrant salsa, made from avocado and coconut yogurt, compliments the succulent shrimp beautifully. This lightened version retains all the flavor while being dairy-free and lower in calories—perfect for any meal!
For a complete experience, consider pairing these shrimps with rice or tortillas. Enjoy this dish as a delightful starter or a satisfying main course, and share it with friends for a taste of authentic Mexican cuisine that’s both nutritious and delicious!
Shrimps in Culichi Salsa
Equipment
- Oven
- Food Processor
- non-stick skillet
Ingredients
Chilies
- 4 pieces Poblano Green Chilli Peppers
- 2 pieces Serrano Green Chilli Peppers
Other Ingredients
- 4 cloves Garlic
- 40 g Spring Onion
- 1 tablespoon Extra Virgin Olive Oil
- 100 g Coconut Yogurt
- 1 ¼ Avocado
- ½ units Juiced Lime
- 1 tablespoon Fresh Cilantro
- 200 g Shrimps
Instructions
Preparation
- Chop green chilli peppers, garlic, and spring onions, and add them to a roasting tray. Drizzle with oil and season with salt and pepper. Roast in a pre-heated oven at 180°C for 15 minutes, tossing halfway through.
- Transfer the roasted peppers to a food processor and add coconut yogurt, avocado, lime juice, and fresh cilantro. Add a splash of water and blitz into a creamy sauce.
- In a non-stick skillet, pan-fry the shrimps for 2-3 minutes or until they turn pink. Remove from heat.


Leave a Reply