
Introduction to Grandma’s Old Fashioned Red Velvet Cake Recipe
Why Red Velvet Cake is a Timeless Classic
There's something undeniably special about red velvet cake. This delightful dessert has captivated hearts for generations, and it's easy to see why. With its rich, velvety texture and striking crimson hue, red velvet cake not only looks stunning on any dessert table but also offers a unique flavor profile that beautifully balances chocolatey undertones with a slight tang from buttermilk.
The history of red velvet cake is as rich as its taste. Originating in the early 20th century, this cake has evolved while still maintaining its status as a beloved classic in American baking. It's perfect for celebrations, from birthdays to holidays, making it an enduring favorite. Perhaps it reminds us of simpler times—like baking in Grandma’s kitchen, where the sweet aroma wafted through the air and laughter filled the room.
In our Grandma’s Old Fashioned Red Velvet Cake Recipe, we honor that tradition with a moist, fluffy cake topped with velvety ermine frosting. If you've ever wondered how to recreate that nostalgia-filled experience at home, you’re in the right place. Let’s dive into the details of this timeless treat, and prepare to indulge in a slice of history!
Ingredients for Grandma’s Old Fashioned Red Velvet Cake
Essential ingredients for the cake
Baking Grandma’s Old Fashioned Red Velvet Cake is a delightful journey filled with love and nostalgia. To create the perfect cake, gather the following essential ingredients:
- 1 cup Spry (or use Crisco)
- 1 ½ cups sugar for that lovely sweetness
- 2 eggs to add moisture and richness
- ¼ cup red food coloring to achieve that beautiful red hue
- 2 tablespoons cocoa for a hint of chocolate flavor
- ½ teaspoon salt to balance the sweetness
- 1 teaspoon vanilla for aromatic charm
- 1 cup buttermilk to ensure a moist and tender cake
- 2 ¼ cups flour for structure
- 1 tablespoon vinegar to activate the baking soda
- 1 teaspoon baking soda for the perfect rise
Key ingredients for the ermine frosting
No red velvet cake is complete without its signature ermine frosting. Here are the key ingredients you’ll need:
- 2 cups milk for creaminess
- ½ cup flour to create a smooth base
- 2 cups butter at room temperature for that fluffy texture
- 2 cups sugar to sweeten the mix
- 2 teaspoons vanilla to elevate the flavor
Looking to elevate your baking skills further? Check out this buttermilk substitute guide for the perfect alternatives! It's all about making baking accessible and enjoyable for every aspiring chef. Happy baking!
Step-by-Step Preparation for Grandma’s Old Fashioned Red Velvet Cake
Preparing Grandma’s Old Fashioned Red Velvet Cake is like stepping back in time—inviting the rich traditions of baking straight into your kitchen. This cake not only delights the taste buds but also creates cherished memories. Let’s break down the preparation into simple and enjoyable steps so you can recreate this classic dessert with ease.
Gather and Prepare Your Baking Equipment
Before diving into the batter, it’s essential to gather all your baking tools. You’ll need:
- 2 9-inch cake pans: Ensure they’re well-greased and floured for easy removal.
- Stand mixer with paddle attachment: This will make creaming the ingredients a breeze.
- 3 small bowls: Perfect for mixing your dry ingredients and the food coloring.
- Medium saucepan: Necessary for preparing the ermine frosting.
Having everything organized will streamline the process and make your baking experience much more enjoyable.
Mix the Cake Batter
Start by preheating your oven to 350 degrees Fahrenheit. In your stand mixer, cream together 1 cup of shortening (like Spry) with 1 ½ cups of sugar until it’s light and fluffy—this step is crucial for a moist cake. Next, mix in 2 eggs one by one for richness.
In a separate small bowl, combine 2 tablespoons of cocoa powder, ½ teaspoon of salt, and ¼ cup of red food coloring. Blend this mixture into your creamed mixture until fully incorporated. Now, alternate adding 1 cup of buttermilk and 2 ¼ cups of flour, beating well after each addition. Finally, combine 1 tablespoon of vinegar with 1 teaspoon of baking soda in another bowl, then gently fold it into the batter to give it that perfect rise.
Prepare and Bake the Cake Layers
Divide your luscious red batter evenly between the two prepared pans. Bake for 25 to 30 minutes, watching carefully to avoid overcooking. Once baked, allow the cakes to cool in the pans for about 10 minutes, then transfer them onto a wire rack to cool completely. Trust me; the fragrance wafting through your kitchen will be heavenly!
Cool and Layer the Cake
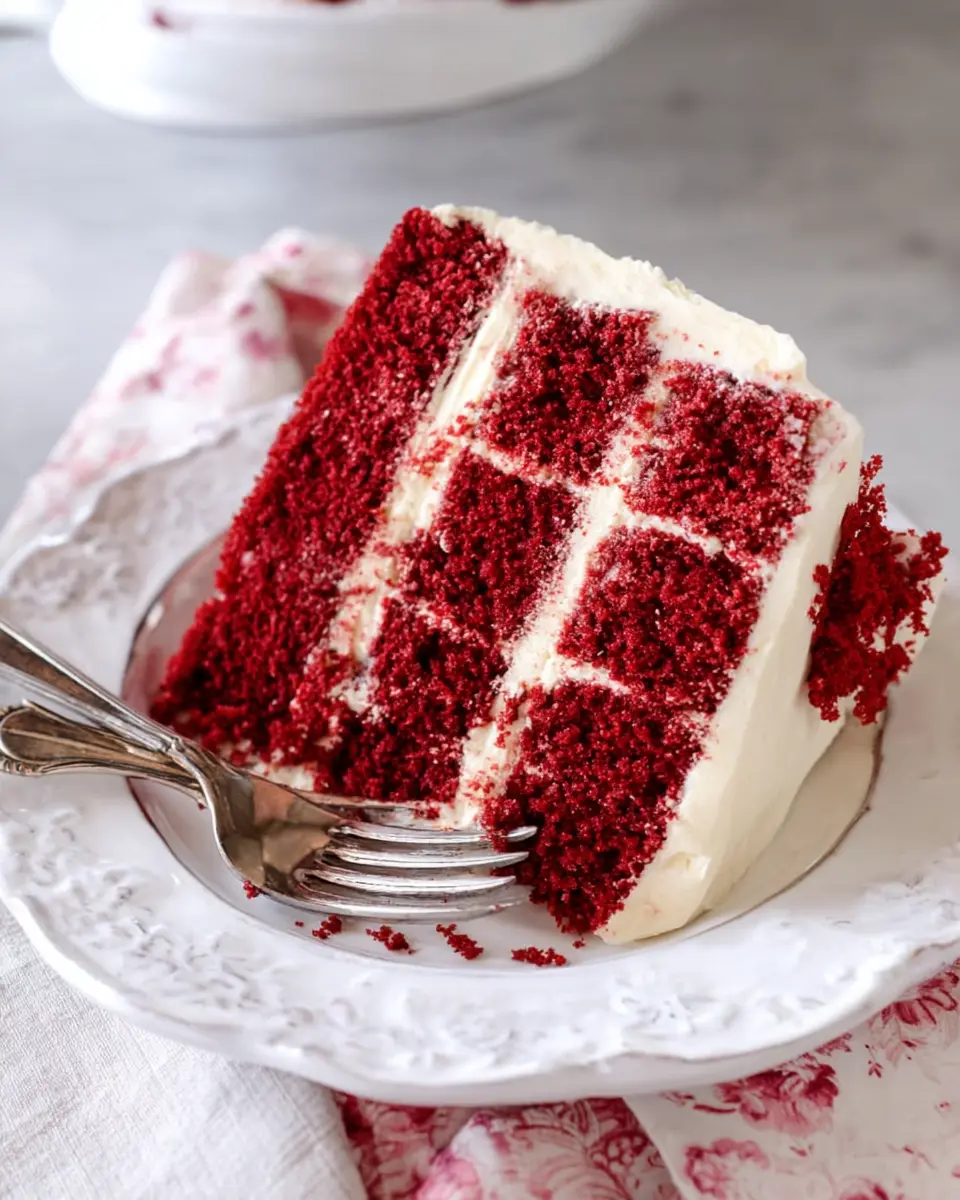
Once cooled, carefully slice each layer in half to create four cake layers. This is where you can let your creativity shine! Stacking and frosting those vibrant layers will surely impress anyone who lays eyes on it.
Make the Ermine Frosting and Frost the Cake
The crowning glory of this Grandma’s Old Fashioned Red Velvet Cake Recipe is the ermine frosting. In a medium saucepan, whisk 2 cups of milk and ½ cup of flour over medium-low heat until it thickens to a paste. Cool this mixture in the refrigerator.
While it cools, beat 2 cups of butter and 2 cups of sugar until light and fluffy. Once the milk mixture has cooled, combine it with the butter mixture and beat until it’s fluffy.
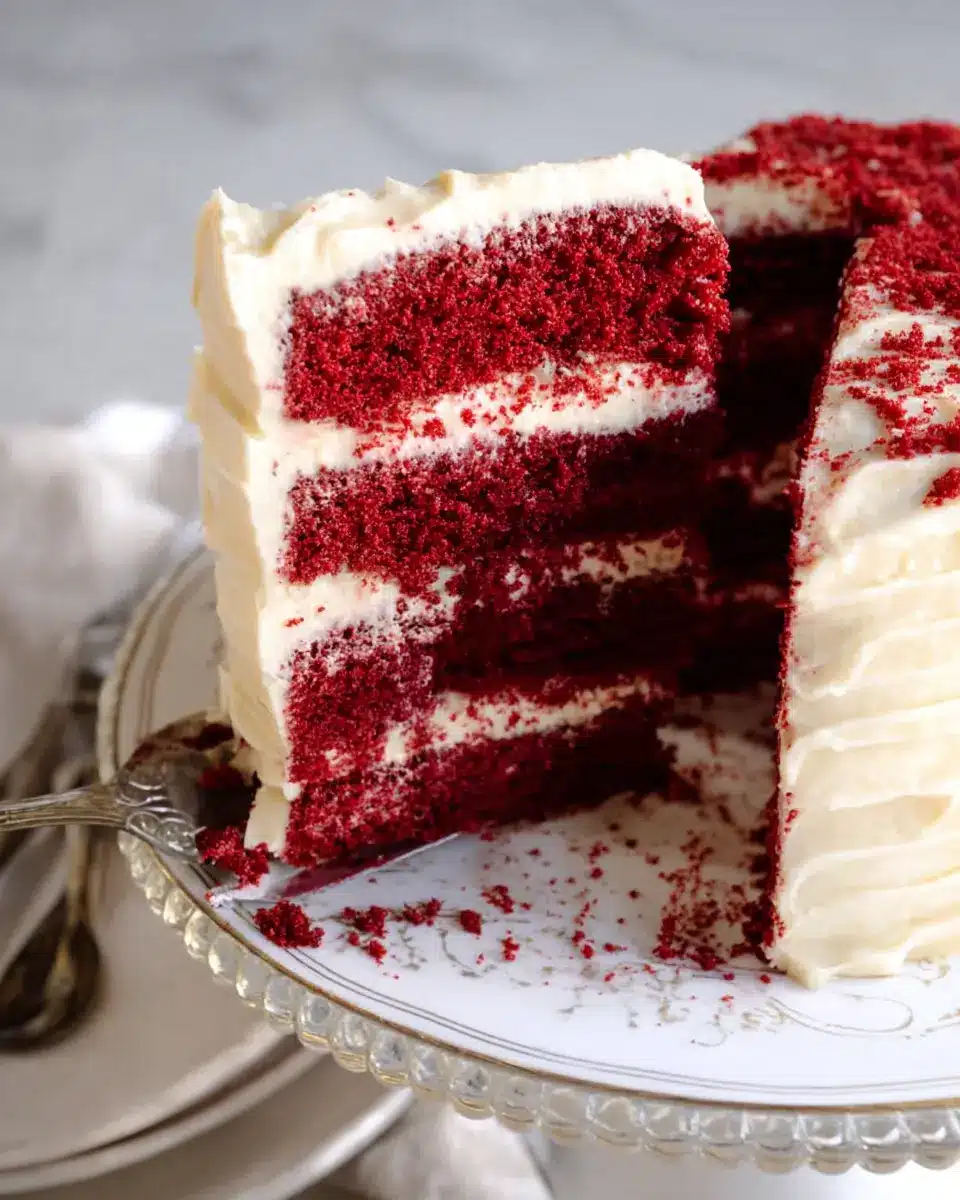
To assemble, place a dollop of frosting on your cake plate before layering the first cake. Frost generously between each layer and all around the sides and top of your cake. Your cake is now not just a dessert; it’s a masterpiece!
Serving your cake right after frosting will make it even more delightful. However, it can be stored in the refrigerator for up to five days, wrapped well to maintain its moistness.
Make sure to share a slice with family or friends, and relish the compliments you receive! For more tips and recipe variations, consider checking Serious Eats or Bon Appétit for inspiration. Happy baking!
Variations on Grandma’s Old Fashioned Red Velvet Cake
Gluten-free red velvet cake options
If you're looking to enjoy Grandma's Old Fashioned Red Velvet Cake but need a gluten-free twist, you’re in luck! Swap out regular flour for a gluten-free blend, ensuring it contains xanthan gum for the perfect texture. You could also utilize almond flour or coconut flour, but keep in mind that adjustments in moisture may be necessary—almost like giving your cake a new wardrobe! For tips on cooking and baking with gluten-free options, check out Gluten-Free Living.
Vegan red velvet twists
Those adhering to a vegan lifestyle can still relish this classic treat! Replace the eggs with flaxseed meal (1 tablespoon of flaxseed mixed with 3 tablespoons of water per egg) and switch to a plant-based shortening. Using non-dairy milk like almond or soy milk in place of buttermilk adds a delightful flavor without the dairy. Vegan baking can be a touch unconventional, but it’s equally rewarding; it’s all about experimenting! Explore more vegan baking ideas at Minimalist Baker.
Cooking Tips and Notes for Grandma’s Old Fashioned Red Velvet Cake
Baking Tips for the Perfect Cake
To achieve that moist, fluffy texture in Grandma's Old Fashioned Red Velvet Cake, ensure your butter is at room temperature before creaming it with sugar. This process incorporates air, leading to a lighter cake. Be careful not to overmix your batter once you add the flour as this can develop gluten. Use a cake tester to check for doneness, aiming for a clean stick when inserted. Remember, each oven is different, so keep an eye on your cakes in the last few minutes of baking.
Storage Tips for Freshness
To keep your red velvet cake fresh, store it in an airtight container in the refrigerator. This will help maintain moisture and flavor. If you plan to enjoy it later, consider wrapping individual slices in plastic wrap to preserve their deliciousness. The cake can stay fresh for up to five days, making it perfect for a week of treats or a cozy gathering with friends. For longer storage, consider freezing the individual layers with parchment paper between them for up to three months!
Serving Suggestions for Grandma’s Old Fashioned Red Velvet Cake
Ideal Pairings for a Delightful Dessert Experience
Grandma’s Old Fashioned Red Velvet Cake is already a showstopper, but a few simple accompaniments can elevate it even further! Consider serving your cake with:
- Fresh Berries: Ripe strawberries or raspberries add a tart contrast that brightens the richness of the cake.
- Vanilla Ice Cream: The creamy texture of vanilla ice cream perfectly complements the fluffy, ermine frosting.
- Coffee or Herbal Tea: A warm cup of coffee or a soothing herbal tea balances the sweetness, making for a delightful afternoon treat.
- Whipped Cream: Light, airy whipped cream can enhance the visual appeal and add a touch of elegance.
Remember, the key is to keep it simple to let the cake shine in all its glory! Looking for additional ideas? Check out these dessert pairing tips for more inspiration.
Time Breakdown for Grandma’s Old Fashioned Red Velvet Cake
Preparation Time
Get ready to dive into baking with a preparation time of about 30 minutes. This includes gathering your ingredients and mixing the batter for Grandma's Old Fashioned Red Velvet Cake.
Baking Time
Your cake will need around 25 to 30 minutes in the oven. Keep an eye on it to ensure it comes out perfectly fluffy and moist.
Cooling Time
After baking, let the cake cool for about 30 minutes. This helps prevent the frosting from melting when you add that luscious ermine frosting.
Total Time
All in all, expect your baking adventure to take approximately 1 hour and 30 minutes from start to finish. Perfect for a weekend project or a special occasion, this cake is sure to impress!
For more tips on achieving the best results, check out this baking guide that dives deeper into the intricacies of baking cakes. Happy baking!
Nutritional Facts for Grandma’s Old Fashioned Red Velvet Cake
When savoring Grandma’s Old Fashioned Red Velvet Cake, it’s good to balance indulgence with awareness of nutritional content. Here’s a quick breakdown of what to expect per slice:
Calories per slice
Each slice of this delightful cake packs approximately 350 calories. It’s a treat you’ll cherish, but portion control is key!
Protein content
You’ll find about 3 grams of protein in each slice, thanks mainly to the eggs and dairy. While not a protein powerhouse, it adds a touch of sustenance to your sweet indulgence.
Sugar content
This delicious cake contains roughly 24 grams of sugar per slice. It's part of what makes it so irresistibly sweet—be sure to enjoy every bite mindfully!
For a more detailed nutritional analysis and healthy baking tips, check out resources from Harvard Health and Nutrition.gov. Eating with both enjoyment and awareness makes Grandma’s cake all the more special!
FAQs about Grandma’s Old Fashioned Red Velvet Cake
Can I make this cake ahead of time?
Absolutely! Grandma’s Old Fashioned Red Velvet Cake is perfect for making ahead. You can prepare the cake layers a day or two in advance, letting them cool completely before wrapping them in plastic. This helps them stay moist. Just frost the cake on the day you plan to serve it for the best texture.
How do I store leftover cake?
Leftover cake can be stored in the refrigerator for up to five days. Ensure you cover it well with plastic wrap to prevent it from drying out or absorbing any odors. If you’re looking to keep it for a longer period, consider freezing individual slices. Just wrap them tightly in plastic wrap followed by foil.
What’s the best way to ensure my cake layers don’t stick?
To prevent sticking, make sure to grease and flour your cake pans thoroughly before pouring in the batter. You can also line the bottoms with parchment paper for an extra layer of protection. This simple step can save you from frustrating times when it’s time to remove the cakes from the pans!
For more cake baking tips, check out resources from Serious Eats or Bon Appétit for additional insights into baking and cake storage.
Conclusion on Grandma’s Old Fashioned Red Velvet Cake
In wrapping up our journey through Grandma’s Old Fashioned Red Velvet Cake Recipe, it’s clear this cherished dessert is a true classic. Its moist texture and rich flavor create a delightful indulgence perfect for any occasion. So why not bake a batch and share some memories? For more tips on cake baking, check out this comprehensive guide on cake decorating. Enjoy!
Grandma’s Old Fashioned Red Velvet Cake Recipe
Equipment
- 2 9-inch cake pans
- Stand mixer with paddle attachment
- 3 Small bowls
- medium saucepan
Ingredients
Red Velvet Cake
- 1 cup Spry (Crisco or Palm Shortening)
- 1.5 cups Sugar
- 0.25 cup Red food coloring
- 2 tablespoon Cocoa
- 0.5 teaspoon Salt
- 1 teaspoon Vanilla
- 1 cup Buttermilk
- 2.25 cups Flour
- 1 tablespoon Vinegar
- 1 teaspoon Baking soda
Ermine Frosting
- 2 cups Milk
- 0.5 cup Flour
- 2 cups Butter at room temperature
- 2 cups Sugar
- 2 teaspoon Vanilla
Instructions
Red Velvet Cake
- Preheat oven to 350 degrees.
- Grease and flour two 9-inch cake pans.
- Cream spry and sugar in the bowl of a stand mixer until fluffy.
- Add eggs and beat for one minute.
- Mix cocoa, salt, and red color in a small bowl.
- Add cocoa mixture to the spry mixture until thoroughly combined.
- Mix vanilla and buttermilk and add to the spry mixture alternating with the flour, beginning and ending with flour. Mix thoroughly after each addition.
- Mix vinegar and soda in a bowl and fold into the above mixture.
- Divide batter into the prepared pans and bake for 25 to 30 minutes. Do not overcook.
- Cool on racks.
- Cut each layer into two layers.
- Frost cake and serve.
Ermine Frosting
- Cook milk and flour in a medium saucepan over medium-low heat, whisking constantly, until a thick paste forms. Let stand until cool, then put in the refrigerator until cold.
- Beat the butter, sugar, and vanilla until fluffy.
- Add cold milk mixture and beat frosting on medium speed until fluffy.
- Add a dollop of frosting to the cake plate before adding your first layer.
- Frost the cake with an offset spatula.
- Store the cake in the refrigerator for up to five days. Cover with plastic wrap to keep the cake from drying out.
Leave a Reply