
Introduction to Lemon Tart
Lemon tart is the ideal dessert for young professionals looking to impress without excessive fuss. This elegant dish combines the bright, zesty flavors of lemon with a silky-smooth custard, all nestled in a delicate pastry crust. The result? A standout dessert that's perfect for any occasion, whether it’s a dinner party with friends or a simple weeknight treat.
One of the best things about this French classic is its short preparation time. In only about 10 minutes, you can assemble your ingredients. Thanks to a straightforward filling process, you won’t be spending hours in the kitchen. Plus, the refreshing taste of lemon can elevate your mood, making it a cheerful end to your meal. Many health experts suggest that citrus fruits like lemons can boost your overall well-being by providing essential vitamins and reducing stress.
If you’re curious about mastering this delightful lemon tart, ensure you check out the detailed recipe that follows. It’s adapted from esteemed chef David Lebovitz, allowing you to recreate an authentic French pastry experience at home. So roll up your sleeves and get ready to dazzle your taste buds!
Ingredients for Lemon Tart
List of Essential Ingredients
Creating a delightful lemon tart requires some key ingredients, each contributing to its tangy and sweet flavor profile:
- Sweet Tart Crust: You can use a homemade Pâte Sucrée or a store-bought sweet tart crust, about 9 inches in diameter.
- Lemon Zest: Use the zest of one lemon to capture the citrus aroma.
- Lemon Juice: Freshly squeezed lemon juice, about half a cup, adds the essential tartness.
- White Sugar: Approximately three-quarters of a cup balances the tangy flavors.
- Unsalted Butter: Twelve tablespoons, cut into cubes, create a rich, creamy filling.
- Eggs: You'll need three large eggs and three extra yolks for the perfect consistency.
Possible Ingredient Substitutions
If you’re missing an ingredient or prefer a tweak, here are some simple substitutions:
- Instead of lemon juice, try lime juice for a different zest.
- If you don’t have unsalted butter, salted butter works in a pinch; just reduce the added salt in your crust.
- For an egg-free option, consider using flaxseed meal as a binding agent—mix one tablespoon with three tablespoons of water for each egg.
Feel free to experiment, and you'll find your lemon tart will still shine through!
Step-by-Step Preparation of Lemon Tart
Preparing a lemon tart is not just about baking; it’s about creating a delightful experience for yourself and those you share it with. This elegantly classic French dessert is as impressive as it is delicious, featuring a perfect balance of sweetness and tanginess. Here’s how to whip up this lemony delight in just a few easy steps.
Prepare the Sweet Tart Crust
Start by making the sweet tart crust, or Pâte Sucrée. This buttery, crumbly crust is a key feature of any standout lemon tart. You can either make it from scratch following a recipe or use a store-bought option for convenience. Here’s how:
- Whisk together flour, powdered sugar, and a pinch of salt in a bowl.
- Cut in cold butter until the mixture resembles coarse crumbs.
- Add an egg yolk and mix until a dough forms. Chill it in the refrigerator for about 30 minutes, then roll it out and fit it into your tart pan.
- Blind bake the crust with parchment paper and baking weights for about 15 minutes at 180°C/350°F until lightly golden.
Make sure to let the crust cool completely to avoid any sogginess when adding the filling.
Make the Lemon Tart Filling
While the tart crust cools, you can prepare the lemon tart filling. This part is where the magic truly happens. In a medium saucepan, combine:
- 1 tablespoon of lemon zest (from about one lemon)
- ½ cup of freshly squeezed lemon juice (about 1-2 lemons)
- ¾ cup of white sugar
- 12 tablespoons (170g) of unsalted butter, cut into small cubes
- 3 large whole eggs and 3 egg yolks
Combine and Whisk Ingredients
Now, let’s get to the fun part—whisking! Place your saucepan over low to medium-low heat. Whisk constantly to prevent the butter from splitting. Continue to cook and whisk for about 5 minutes, or until the mixture thickens. You’re looking for a texture that holds shape enough to mound when dolloped.
Once you’ve achieved this creamy consistency, strain the mixture through a fine mesh strainer into a bowl, ensuring a silky filling free from any lumps.
Bake and Set the Tart
Carefully pour the strained filling into your cooled tart crust. Bake for just 5 minutes, keeping in mind that it will still feel soft to touch. This minimal baking helps set the tart enough for slicing but preserves that melt-in-your-mouth texture we all love.
Cool and Prepare for Serving
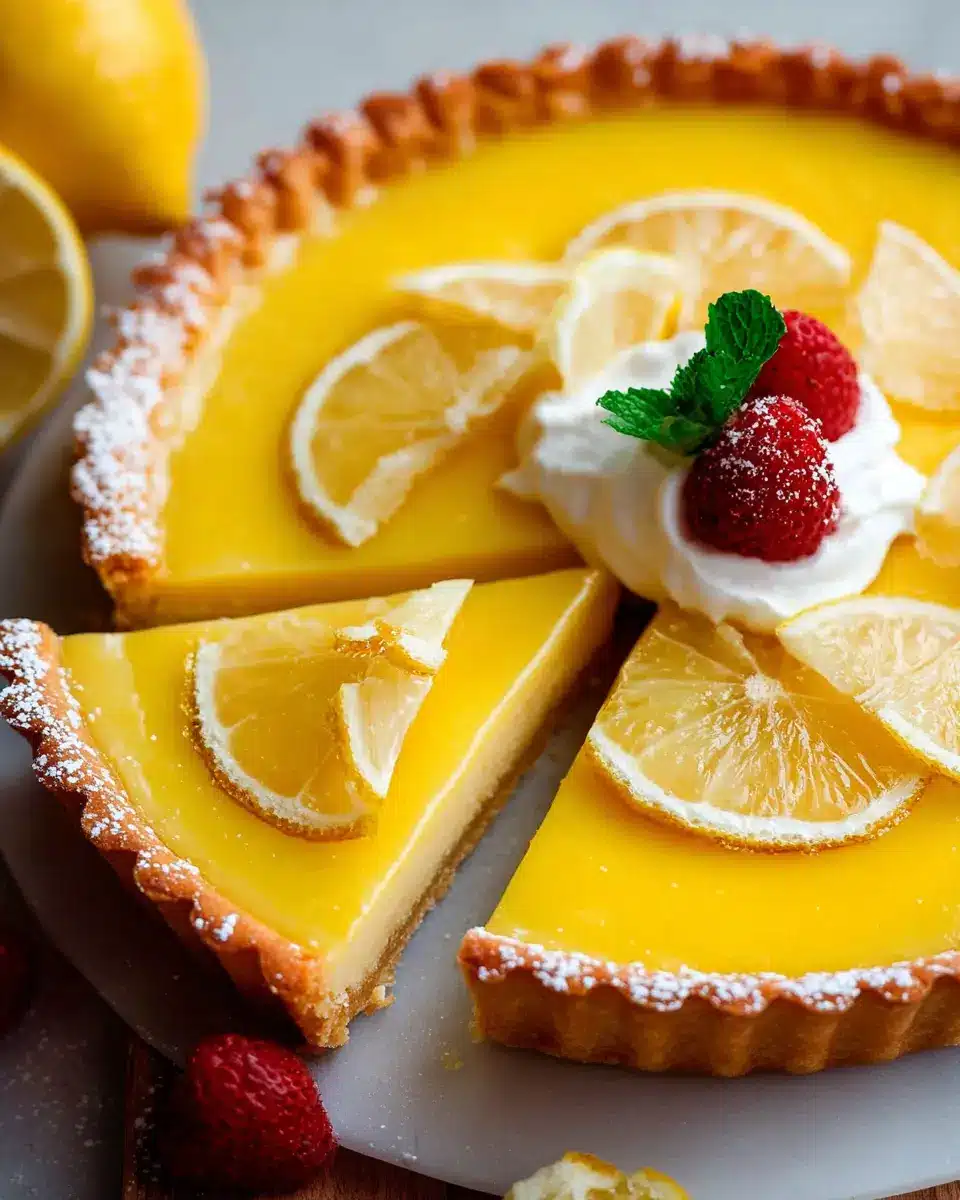
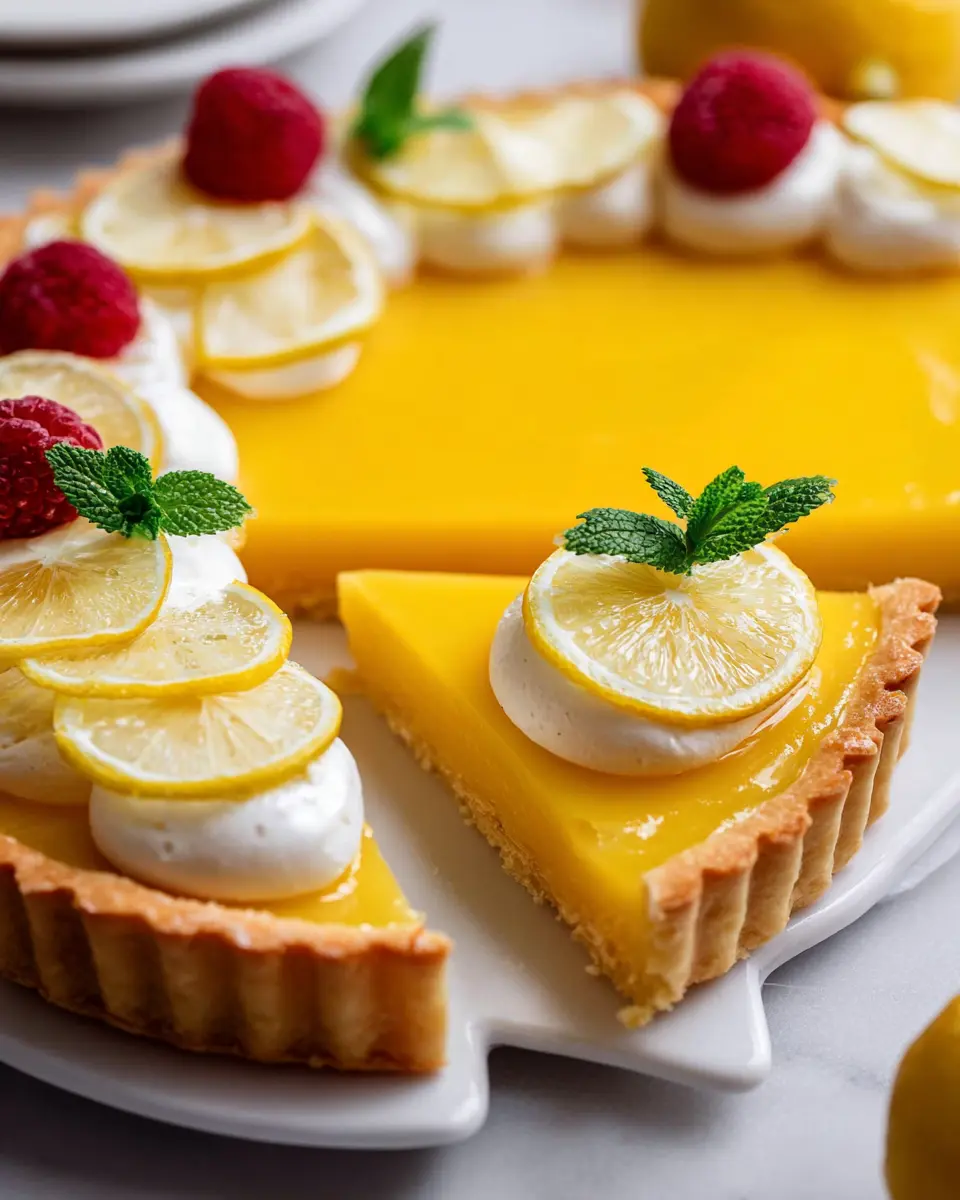
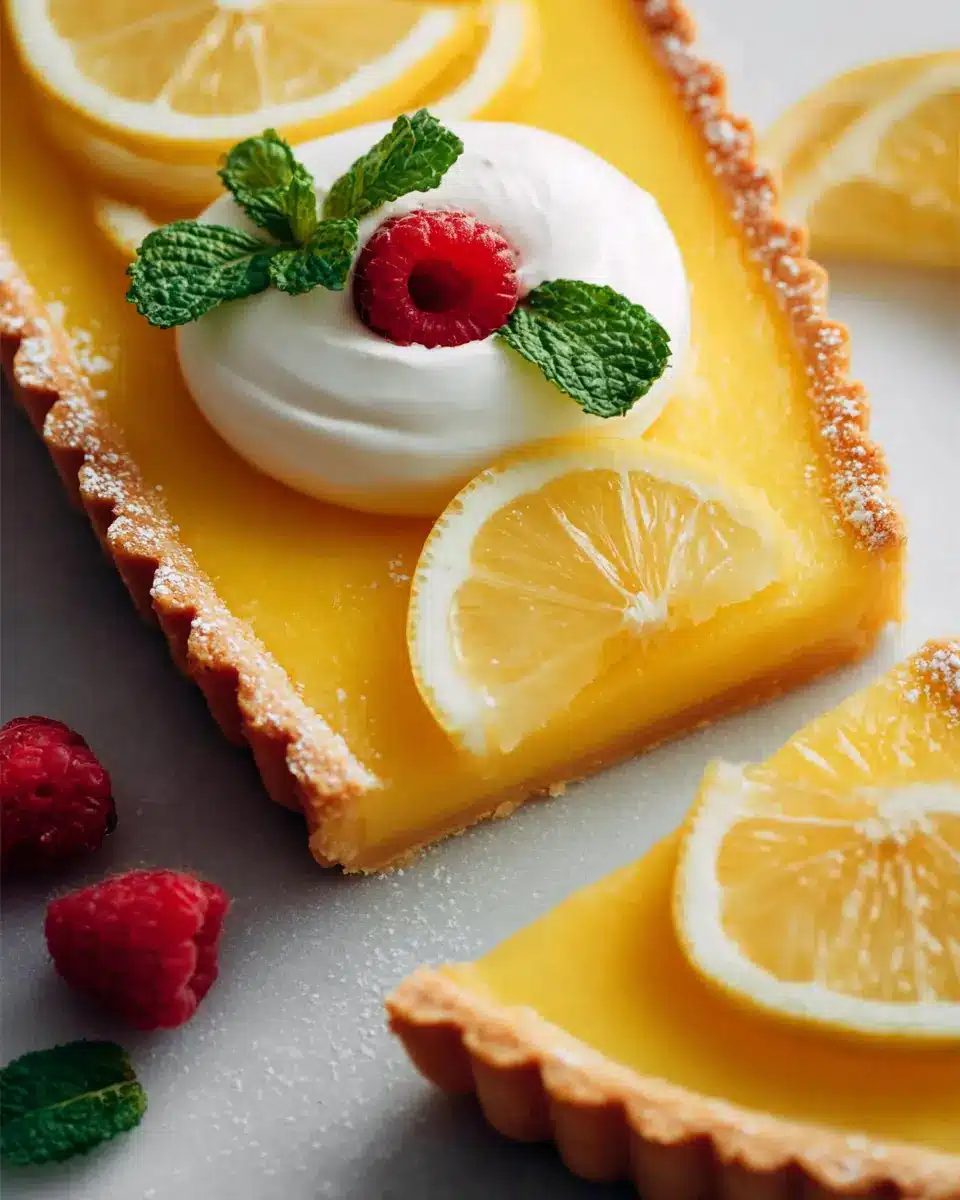
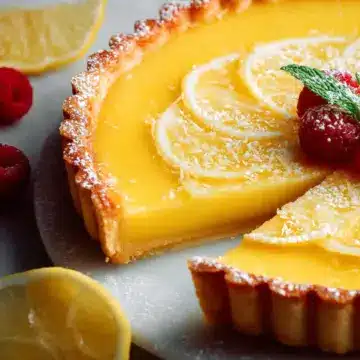
After baking, the tart needs time to cool completely on a wire rack. This step is crucial as it allows the filling to set properly. Once cooled, garnish with a dusting of powdered sugar or fresh berries and serve with a dollop of crème fraîche or whipped cream for an extra touch of elegance.
And there you have it—a splendid lemon tart that’s sure to impress! So, why not gather some friends and enjoy a slice of your homemade masterpiece?
Variations of Lemon Tart
Classic French Lemon Tart Variations
The classic French lemon tart, or tarte au citron, can be easily adapted to suit different tastes. One popular variation includes a luscious Lemon Meringue Tart, topped with fluffy meringue that adds a sweet contrast to the tangy filling. For a more indulgent treat, try a Lemon Coconut Tart, where shredded coconut is incorporated into the crust or filling, giving an exotic twist. Each rendition retains that signature zesty flavor while introducing new textures and dimensions to this beloved dessert.
Unique Flavor Additions and Twists
Don't be afraid to experiment! Adding flavors like fresh ginger or lavender can elevate your lemon tart to new heights. For a refreshing change, consider incorporating berry purees or matcha powder. These additions not only enhance the visual appeal but also create delightful flavor contrasts worth exploring. If you're feeling adventurous, a creamy lemon basil tart might just become your new favorite! For more inspirations, check out these creative ideas on Serious Eats or BBC Good Food.
Cooking Tips and Notes for Lemon Tart
Common Mistakes to Avoid
When making your lemon tart, it's easy to overlook a few key details. Always ensure your butter is at room temperature to avoid splitting in the filling. Additionally, don’t rush the thickening process; if you crank up the heat, you might end up with scrambled eggs instead of a smooth filling. Straining the mixture is crucial, too—it captures any curdled bits, ensuring a silky texture.
Temperature Control Tips
Maintaining a low and steady temperature while cooking your filling is essential for a luscious lemon tart. Use a thermometer if needed; the ideal temperature for custard is around 160-170°F (71-77°C). Additionally, allow your tart to cool completely before slicing. This step helps the filling set perfectly, making those neat slices a breeze! For more tips on mastering custards, check out Professional Cooking Techniques.
Serving Suggestions for Lemon Tart
Suggested Pairings and Garnishes
Elevate your lemon tart experience with delightful accompaniments! A dollop of creme fraiche or whipped cream adds a rich, creamy contrast to the tartness. For a fruity twist, top with fresh berries like raspberries or blueberries. Feeling adventurous? Edible flowers or lemon slices can bring a touch of elegance. You might also consider serving it alongside a refreshing cup of herbal tea or sparkling water infused with mint for a perfect balance of flavors.
Best Ways to Present the Tart
Presentation is key for a show-stopping dessert! Aim for a clean slice using a sharp knife warmed under hot water. Arrange slices on a minimalist white plate to let the lemon tart’s vibrant yellow shine. Garnish each piece with a sprinkle of icing sugar for a hint of sweetness, or pipe on a little extra cream for flair. A few fresh herbs scattered around the tart can enhance its visual appeal while underscoring its fresh flavor. Find inspiration on The Kitchn for beautiful presentation ideas!
Time Breakdown for Lemon Tart
Preparation Time
The preparation for this delightful lemon tart takes just 10 minutes. It’s a quick process—perfect for your busy afternoons! Gather your ingredients, whip up the filling, and get that crust prepped.
Cooking Time
Baking is a breeze as well, clocking in at only 15 minutes. This short baking time allows the lemon tart to set just right, ensuring you’ll have that melt-in-your-mouth creamy texture everyone loves.
Total Time
In total, you're looking at about 25 minutes to create this elegant dessert, not including cooling time. That means you can enjoy a tantalizing treat in no time! So, why not surprise your friends or family with this classic French favorite? For more tips on perfecting your tart crust, check out this helpful guide. Happy baking!
Nutritional Facts for Lemon Tart
Key Nutritional Information
Indulging in a slice of lemon tart can be a delightful treat, and it's good to know what you're consuming. Each serving (one slice) contains those essential numbers:
- Calories: 183
- Carbohydrates: 13g
- Protein: 3g
- Fat: 13g
- Sugar: 13g
When you savor this French classic, you're getting a balance of sweetness and creamy goodness.
Serving Size Considerations
It’s easy to get carried away with such a zesty dessert! Keep in mind that this recipe yields 12 slices, making it perfect for sharing at gatherings or enjoying over a few days. For a lighter option, consider pairing a slice with some fresh fruit or a dollop of yogurt to balance that tart richness. Remember, moderation is key!
For more insights on the health benefits of citrus fruits, visit Healthline for an in-depth look.
FAQs About Lemon Tart
How can I tell when my lemon tart is done?
To determine if your lemon tart is perfectly set, look for a slight jiggle in the center when you gently shake the pan. It should hold its shape but still be a little soft, just like a perfectly baked custard. Remember, it will continue to firm up as it cools!
Can I make lemon tart in advance?
Absolutely! In fact, making your lemon tart a day ahead can enhance its flavors. Just allow it to cool completely after baking before covering it with plastic wrap. Store it in the refrigerator until you’re ready to serve to ensure it stays fresh and delightful.
What’s the best way to store leftover lemon tart?
To keep your lemon tart fresh, wrap any leftovers well with plastic wrap or place them in an airtight container. It can be stored in the fridge for up to four days. For an exquisite experience, enjoy it cold or let it come to room temperature before serving!
For more tips on preparing tarts, check out sources like Bon Appétit and New York Times Cooking.
Conclusion on Lemon Tart
Final Thoughts on Making Lemon Tart
Creating the perfect lemon tart is an enriching experience that combines simplicity with refinement. When you follow the steps carefully, you’ll find joy in the creamy filling and delicate crust. Don’t forget to savor every bite – it’s a treat worth sharing! Happy baking!
For more delightful recipes, check out this link.
Lemon Tart
Equipment
- medium saucepan
- Offset spatula
- Fine mesh strainer
Ingredients
Tart Crust
- 1 crust sweet tart crust or homemade pie crust, or store-bought
Lemon Tart Filling
- 1 tablespoon lemon zest (1 lemon's worth)
- ½ cup lemon juice (from 1 – 2 lemons)
- ¾ cup white sugar
- 12 tablespoon unsalted butter cut in 1cm (½") cubes
- 3 whole large eggs
- 3 yolks large eggs (from large-size eggs)
Instructions
Tart Crust
- Make tart crust per linked recipe, including blind baking. Allow to fully cool before filling.
Lemon Tart Filling
- Preheat oven to 180℃/350℉ (160℃ fan).
- Put all ingredients in a medium saucepan and whisk to combine.
- Place the saucepan on low/medium low heat. Whisk constantly until thickened (about 5 minutes).
- Strain into a bowl using a fine mesh strainer.
- Pour into tart shell and smooth the filling surface using an offset spatula.
- Bake for 5 minutes. Allow to cool fully before slicing.
- Decorate if desired with lemon slices or dust with icing sugar.

Leave a Reply