
Introduction to Easy No-Knead Crusty Bread
Why Homemade Bread is a Game-Changer for Young Professionals
Imagine coming home after a long day, and the comforting aroma of freshly baked bread fills the air. Easy no-knead crusty bread not only tantalizes your senses but also transforms your weeknight meals into something extraordinary. With just four simple ingredients and minimal effort, this bread is a lifesaver for young professionals juggling work, life, and everything in between.
Homemade bread is a true game-changer. It’s much healthier, as you control the ingredients—no preservatives or mystery additives here! Plus, there's a sense of accomplishment in creating something from scratch. Research shows that cooking at home can enhance your mood and inspire healthier eating habits. By whipping up this easy no-knead crusty bread, you’re setting the stage for delightful sandwiches, hearty soups, or even breakfast toast topped with avocado or turkey bacon.
Don’t worry if you’ve never baked bread before! This recipe is designed to be approachable. With just 10 minutes of active prep time, you can create a mouthwatering loaf that will impress your dinner guests or elevate your lunch game. Let’s dive into the process and turn your kitchen into a bakery!
Ingredients for Easy No-Knead Crusty Bread
Essential ingredients for a perfect loaf
Creating the easy no-knead crusty bread you’ve been dreaming about is simpler than you think! With just a few key ingredients, you can whip up a delightful loaf that’s perfect for sandwiches or as a side to any meal. Here’s what you’ll need:
- 4 cups bread flour (or all-purpose flour): For that chewy texture; bread flour creates the ideal crust.
- 2 ¼ teaspoons instant yeast: This will help your dough rise effortlessly. (If you prefer active dry yeast, check out the notes in the full recipe!)
- 2 ½ teaspoons salt: This not only adds flavor but strengthens the dough.
- 2 cups warm water (around 110-120°F): Helps activate the yeast and creates a delightful doughy consistency.
Alternative options for flexibility
Don’t worry if you’re missing some ingredients! You can still achieve a fantastic result.
- All-purpose flour can be used instead of bread flour in a pinch; your bread will still taste great, just slightly different in texture.
- If you prefer a more complex flavor, consider adding herbs or spices, like rosemary or garlic powder, to elevate your loaf.
For more information on flour types and their uses, check out this resource. Just remember, experimenting is half the fun in baking!
Preparing Easy No-Knead Crusty Bread
Baking easy no-knead crusty bread is not just about making a loaf; it’s an experience filled with anticipation and joy. The whole process is quite simple, making it an excellent project for beginners. Follow these steps, and you’ll have a glorious homemade loaf that’s perfect for sandwiches or slathered with butter.
Gather Your Equipment
Before you dive in, it's essential to ensure you have the right tools. This will streamline your baking process.
- Measuring utensils: Consistency is key in baking.
- Mixing bowl: A sizable bowl will help in mixing the ingredients without mess.
- Dutch oven: A must-have for achieving that beautifully crusty exterior.
You can find these tools at most kitchen supply stores or online.
Mixing the Dough
Start by adding the dry ingredients to your mixing bowl:
- 4 cups of bread flour
- 2 ¼ teaspoons of instant yeast
- 2 ½ teaspoons of salt
Once those are combined, it's time to mix in the wet ingredients. Add 2 cups of warm water (ideally between 110°F and 120°F) and stir using a sturdy spoon until everything is well incorporated. Your dough should look shaggy and wet, indicating it’s ready to rise. This step is crucial, as it’s the foundation for your easy no-knead crusty bread.
Letting the Dough Rise
After mixing, cover the bowl with plastic wrap and set it aside for 2-3 hours. This resting period allows the dough to rise and develop flavor. Some bakers even recommend refrigerating it overnight for enhanced flavor (up to 12 hours). Imagine the aroma wafting through your kitchen when it finishes baking!
Preheating the Oven and Preparing for Baking
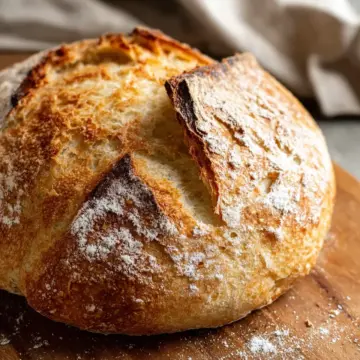
Once the dough has risen and is double in size, it’s time for the oven. Place your Dutch oven (with the lid on) in the oven and preheat it to 450°F. While the oven heats, lightly sprinkle flour on a clean work surface and gently scrape the dough out onto it. Don’t worry about making it perfect—just shape it into a ball and place it seam side down on a piece of parchment paper.
Baking the Bread
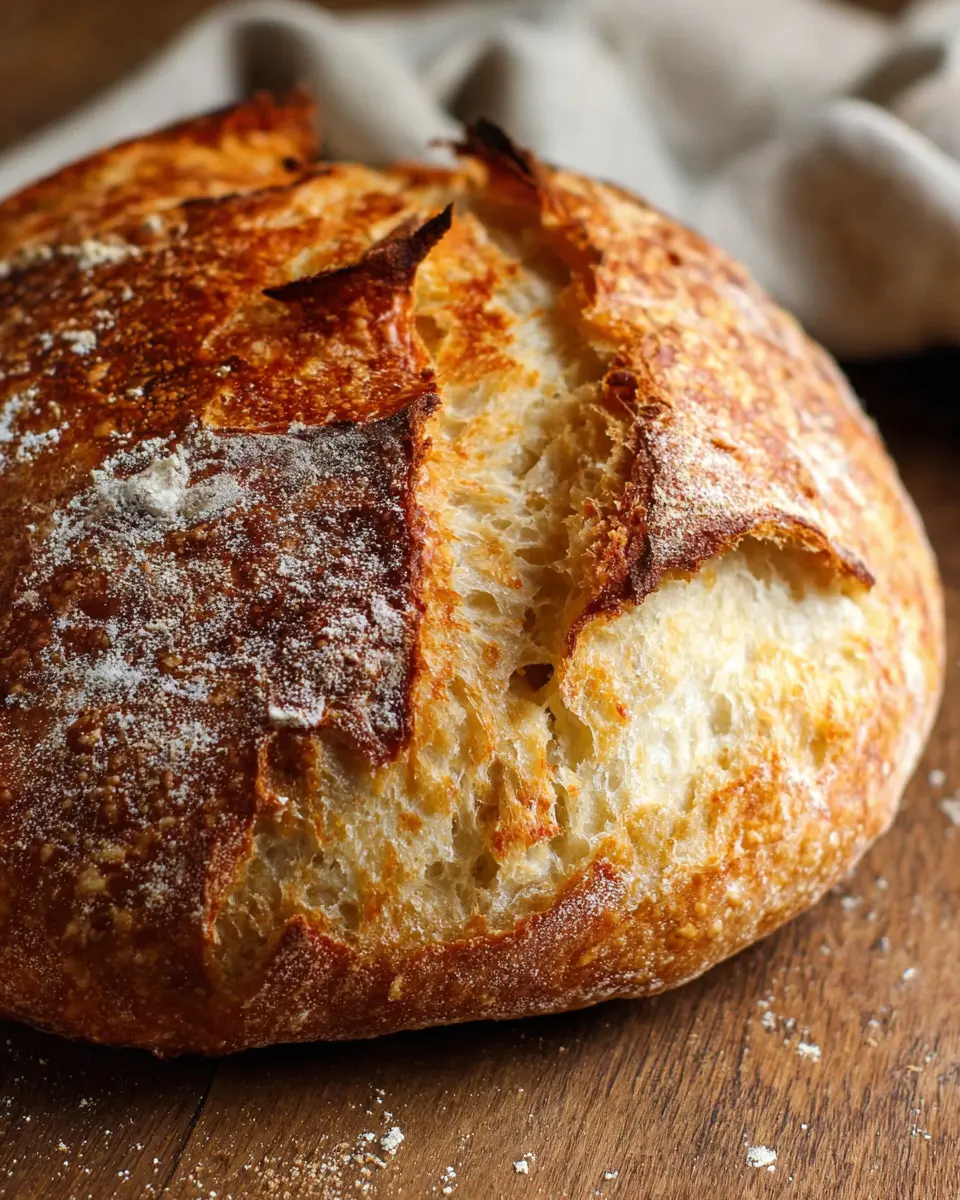
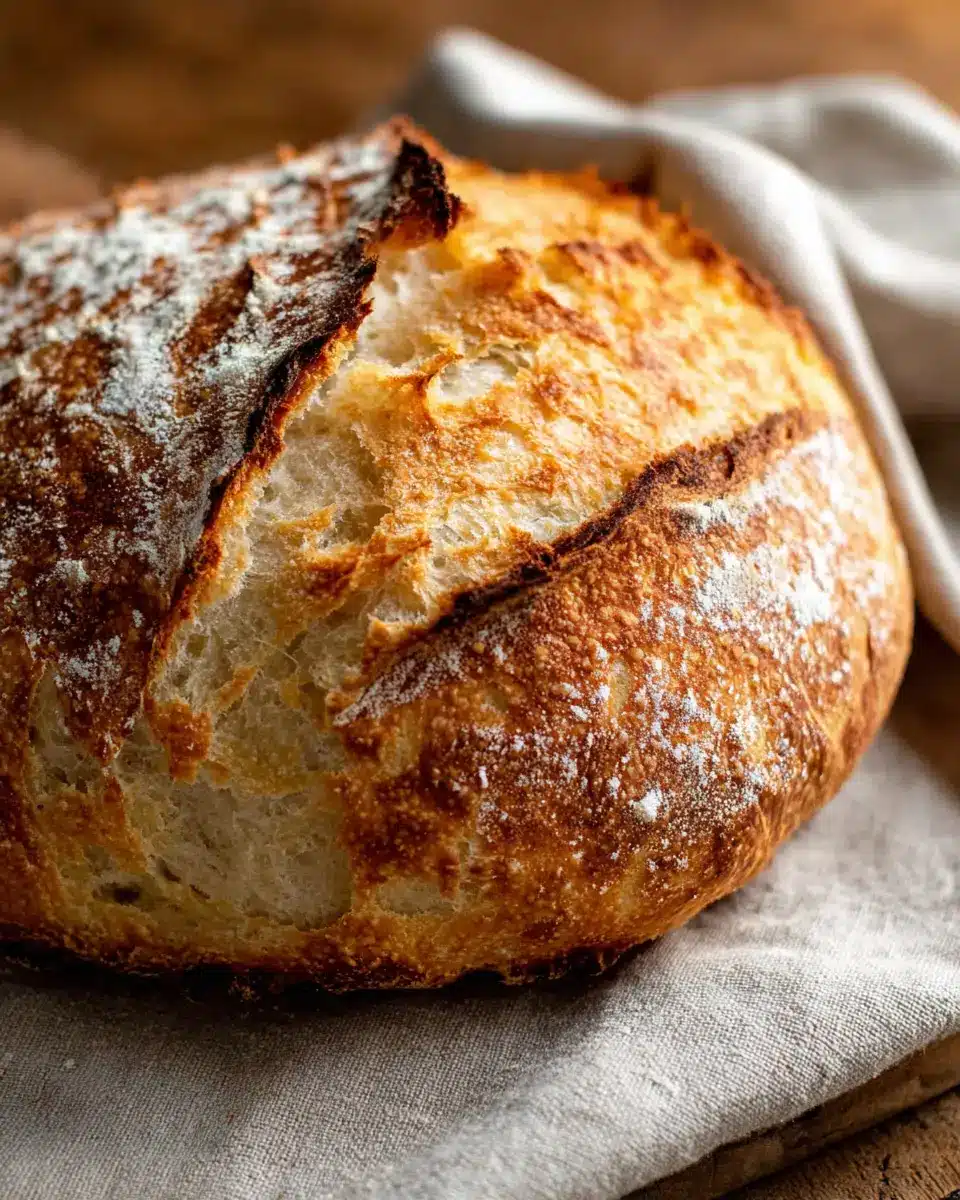
When the oven reaches temperature, carefully remove the hot Dutch oven and transfer the parchment with the dough into it. Cover with the lid and bake for 30 minutes. After this initial bake, remove the lid and continue to bake for an additional 10-15 minutes until it’s a delightful golden brown. This is when the magic happens—you’ll appreciate the crisp crust that makes this bread so special.
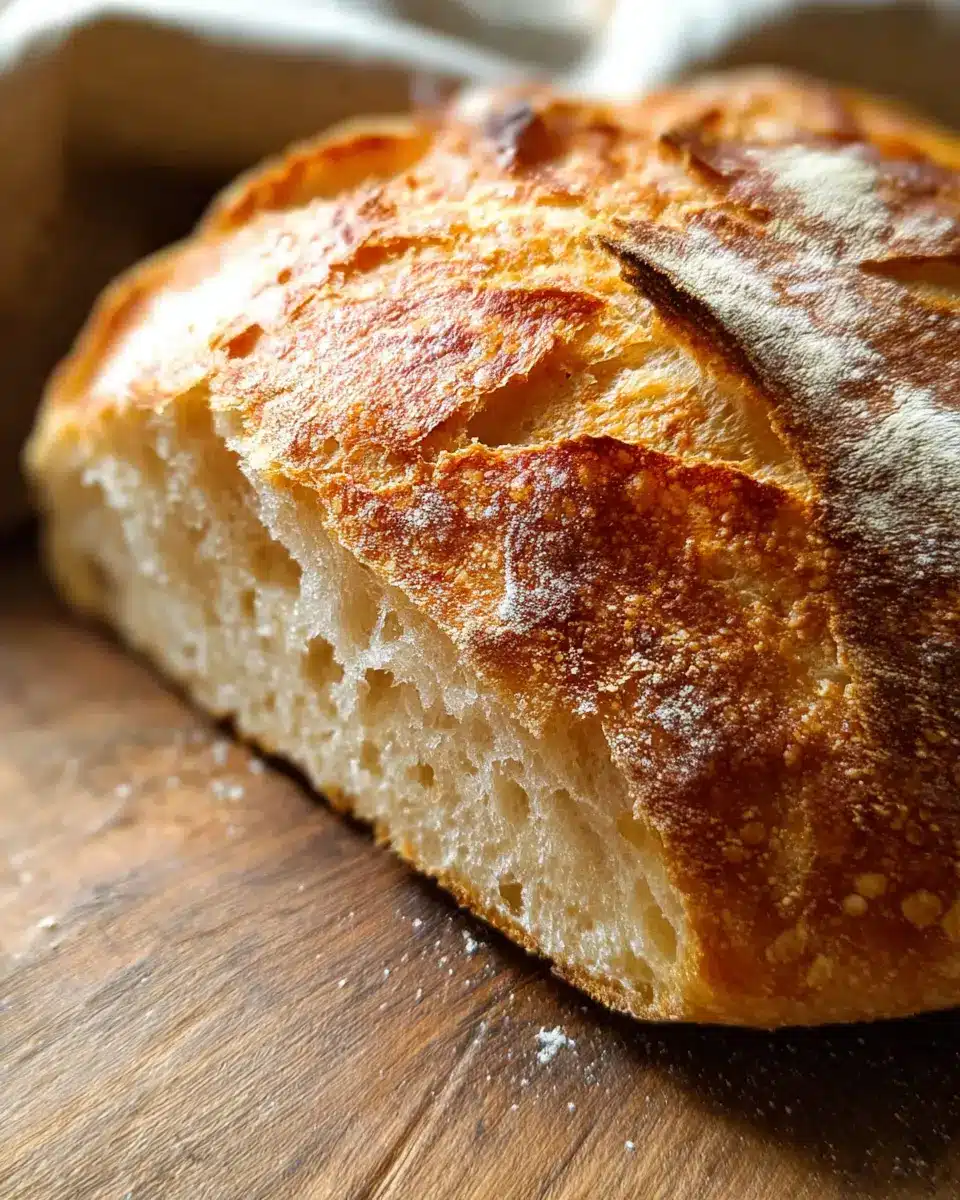
Cooling and Slicing
Once your bread is out of the oven, let it cool on a wire rack for about an hour. This waiting period helps the crumb set properly, making it easier to slice. Once cooled, feel free to slice into your masterpiece! The inside should be soft and chewy, perfectly contrasting the crusty exterior.
Enjoy your easy no-knead crusty bread! It’s perfect for sandwiches or enjoying with a light soup. Happy baking!
Variations on Easy No-Knead Crusty Bread
Herb-infused no-knead bread
Why stick to the basics when you can take your easy no-knead crusty bread to the next level? Adding a variety of herbs can infuse delightful flavors into your loaf. Consider mixing in dried rosemary, thyme, or oregano right into your dough. Fresh herbs can also work beautifully! Simply chop them finely and fold them in during the mixing stage. The aroma that wafts through your kitchen will be heavenly. Pair your herb-infused creation with olive oil for dipping or serve alongside your favorite pasta dishes!
Cheese and garlic no-knead bread
If you’re a cheese lover (who isn’t?), try incorporating shredded cheese along with minced garlic for an irresistible twist. Cheddar, mozzarella, or even a sharp Gruyère can add depth to your easy no-knead crusty bread. Mix in about a cup of cheese and a few cloves of garlic—it’ll transform your bread into a gourmet delight. You can also sprinkle some cheese on top during the last few minutes of baking for a beautifully melted finish. This cheesy bread pairs perfectly with soups, salads, or simply enjoyed warm right out of the oven!
Cooking tips and notes for Easy No-Knead Crusty Bread
Best practices for dough storage
To achieve the most flavorful easy no-knead crusty bread, consider refrigerating the dough for up to 12 hours after the first rise. This extended fermentation enhances flavor and texture. Just remember to cover the bowl tightly with plastic wrap to prevent it from drying out. If you have leftover dough, you can store it in the fridge for up to two weeks! Simply let it come to room temperature before baking.
Troubleshooting common issues
If you find your bread isn't rising as expected, check your yeast's freshness. Also, make sure your water is warm (ideal temperature: 110-120°F) but not too hot, which can kill the yeast. For too-dense bread, try increasing the hydration slightly—adding a touch more water can make all the difference. Lastly, if you’re struggling with that perfect crust, a preheated Dutch oven is key!
Serving suggestions for Easy No-Knead Crusty Bread
Pairing with spreads and dips
Your easy no-knead crusty bread is a fabulous canvas for a variety of spreads and dips. Consider slathering it with creamy butter, or try a dollop of fresh herb-infused goat cheese. Hummus made from chickpeas offers a lovely contrast, while roasted red pepper dip adds a sweet and smoky flavor. For something zesty, experiment with a homemade olive tapenade. The chewy texture of the bread makes it perfect for scooping, allowing you to savor every bite.
Serving with soups and salads
This crusty bread shines when served alongside warm, comforting soups or crisp salads. Pair it with a classic tomato basil soup for a delightful meal, or enjoy it with a hearty beef stew that complements the bread’s robust crust. For salads, think fresh greens mixed with roasted veggies, drizzled with a tangy vinaigrette. The bread’s texture can soak up those delicious dressings, making every bite a perfect combination. Whether you're hosting friends or enjoying a cozy evening in, your easy no-knead crusty bread will be a hit!
For more pairing inspiration, check out this guide on bread pairings.
Time Breakdown for Easy No-Knead Crusty Bread
Preparation Time
Get started with just 10 minutes of prep. Mix your ingredients and set the stage for your homemade easy no-knead crusty bread.
Rising Time
The magic happens while you let the dough rise for about 2 hours. Watch it double in size, creating a wonderful airy texture you’ll love.
Baking Time
Finally, the bread bakes to perfection in 45 minutes. Enjoy the enticing aroma as your loaf becomes golden and crusty—a true delight for the senses!
This simple timeline makes it easy to fit fresh bread into your day. Did you know that baking bread at home can be a relaxing experience that also fills your kitchen with warmth and comfort? Grab this opportunity to savor the art of homemade bread!
Want to learn more about bread making? Check out resources on King Arthur Baking for tips and tricks!
Nutritional Facts for Easy No-Knead Crusty Bread
Calories Per Serving
A delightful loaf of easy no-knead crusty bread contains approximately 1893 calories total. If you slice your bread into 12 portions, each serving has around 157 calories. Perfect for enjoying a hearty slice with your favorite toppings!
Carbohydrate and Protein Content
This scrumptious bread boasts 374 grams of carbohydrates and 71 grams of protein for the entire loaf. Carbohydrates provide the energy boost you need, while the protein content contributes to the bread's satisfying texture. Enjoy this homemade delight as part of a balanced meal or snack!
For more detailed nutritional insights, consider checking out resources like Harvard Health or the USDA FoodData Central for comprehensive information on the nutritional benefits of bread and ingredients used in baking.
FAQs about Easy No-Knead Crusty Bread
Can I use active yeast instead of instant yeast?
Absolutely! While the recipe calls for instant yeast for ease, you can use active dry yeast. Simply swap in ¾ teaspoon of active yeast and let the dough rise overnight for that signature flavor development. For detailed instructions, check out the active yeast guide.
How long does no-knead bread stay fresh?
Your easy no-knead crusty bread will typically stay fresh for about 3 days when stored in a paper bag. To keep it from drying out, avoid plastic bags, as they can cause the crust to become soggy. If you want to keep it longer, freezing is your best bet!
Can I freeze no-knead bread?
Yes, you can! Slice the bread and wrap it tightly in plastic wrap, then place it in a freezer-safe bag. You'll enjoy delicious slices of fresh bread anytime you want, just pop them in the toaster or let them thaw at room temperature. For more tips on freezing bread, visit The Kitchn’s freezer guide.
Enjoy your bread-making journey!
Conclusion on Easy No-Knead Crusty Bread
In just a few hours, you can create delicious, homemade bread that is perfect for any meal. This easy no-knead crusty bread recipe is approachable for beginners yet satisfying for experienced bakers. So, why wait? Gather your ingredients and enjoy the delightful aroma of fresh bread filling your kitchen!
Easy No-Knead Crusty Bread
Equipment
- measuring utensils
- Mixing bowl
- Dutch oven
Ingredients
- 4 cups bread flour or all-purpose flour
- 2 ¼ teaspoons instant yeast (1 packet) see notes for active yeast
- 2 ½ teaspoons salt
- 2 cups warm water (110 - 120°F)
Instructions
- In a large bowl, mix together the flour, yeast and salt.
- Pour in the warm water and use a sturdy spoon to mix together until fully combined. The dough should be wet and shaggy, but not runny.
- Cover the bowl with plastic wrap and let rise for about 2-3 hours, or until doubled in size.
- Optional: once the dough has doubled in size, you can store it covered in the refrigerator for up to 12 hours for enhanced flavor development, or continue to follow the instructions below to bake right away.
- When you're ready to bake, place the dutch oven with the lid on into the oven and preheat the oven to 450°F.
- Once the oven is preheated, lightly sprinkle a work surface with about a tablespoon of flour. Scrape the dough out of the bowl onto your floured surface and roughly shape into a ball. No need for it to be perfect. It'll look nice once it bakes. Place the dough ball seam side down on a sheet of parchment paper.
- Once the oven is preheated, remove the hot dutch oven and transfer the parchment paper with the dough to the dutch oven. Cover with the lid and bake for 30 minutes. Remove the lid and bake an additional 10-15 minutes until golden and crispy on top.
- Lift the parchment paper with the bread from the dutch oven and let cool for 1 hour, then slice and enjoy!


Leave a Reply