
Introduction to Grilled Cheese Roll Ups
Why Grilled Cheese Roll Ups are the Perfect Comfort Food
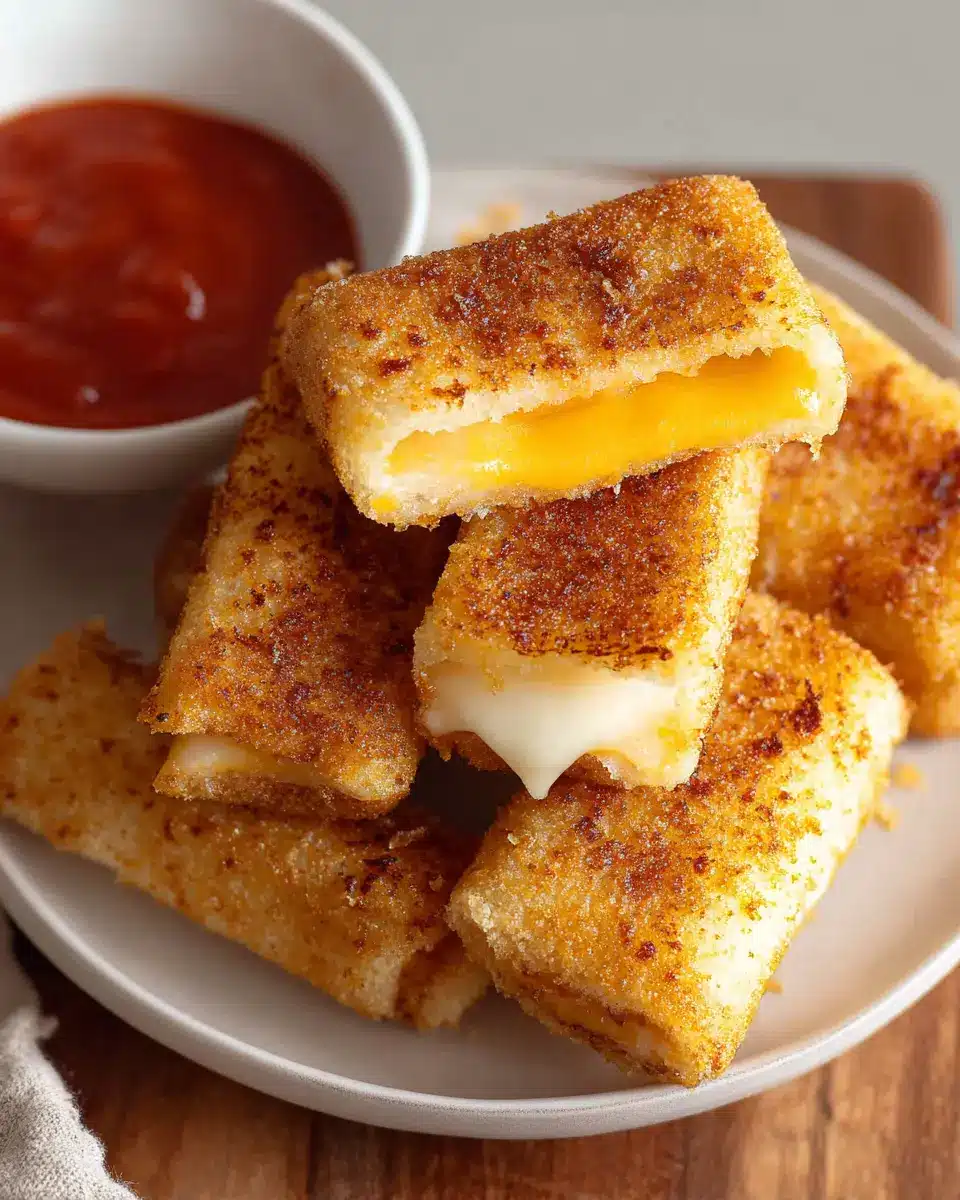
When it comes to comfort food, the classic grilled cheese sandwich often takes center stage. But what if I told you there's a twist on this timeless favorite that enhances the fun factor? Enter the grilled cheese roll ups! These bite-sized wonders are the epitome of cozy culinary delights.
Imagine sinking your teeth into crispy, buttery exteriors and gooey, melty cheese inside. The sheer joy of rolling soft bread around cheese allows for easy dipping into your favorite sauces—be it tangy marinara, warm tomato soup, or zesty ranch dressing. It's a playful take on a beloved classic that’s perfect for casual gatherings or a cozy night in.
The beauty of these roll ups lies not just in their taste but also in their versatility. Whether you're hosting a gathering, preparing a quick meal for yourself, or delighting your kids with a fun lunch, these roll ups cater to all occasions. Plus, they come together in just 20 minutes, making them a go-to recipe for busy young professionals. Who wouldn’t love a dish that’s quick, delicious, and downright enjoyable to eat? Dive into this recipe and discover your new comfort food obsession! For ingredients and easy steps, check out the full recipe here.

Ingredients for Grilled Cheese Roll Ups
Essential ingredients for a delicious roll up
Creating the perfect grilled cheese roll ups starts with the essentials. For this recipe, you will need:
- 8 slices of soft white bread: This classic choice offers a tender texture that crisps up beautifully when cooked.
- 1 cup of shredded cheddar cheese: Feel free to get creative! Cheddar’s sharpness adds a delightful flavor, but you can mix in other cheeses like mozzarella for a gooey twist.
- 6 tablespoons of butter (divided): Butter is key for achieving that golden brown color and rich flavor.
These three simple staples form the foundation of your delicious roll ups.
Optional ingredients for added flavor
To elevate your grilled cheese roll ups, consider adding some optional ingredients:
- Turkey bacon or Chicken ham: For a savory protein boost, these choices offer a delicious twist.
- Spices: A sprinkle of garlic powder or Italian seasoning can add an aromatic touch that’s simply irresistible.
- Dipping sauces: Pair your roll ups with marinara sauce, tomato soup, or ranch dressing for an extra layer of flavor.
Experiment with these optional ingredients to make your roll ups uniquely yours!
Step-by-Step Preparation of Grilled Cheese Roll Ups
Making grilled cheese roll ups is a fun and straightforward process that even beginner cooks can master. By following these easy steps, you’ll have delicious, cheesy snacks ready in no time!
Gather and trim the ingredients
Before diving in, make sure you have all the essentials on hand. You'll need:
- 8 slices of soft white bread
- 1 cup of shredded cheddar cheese
- 6 tablespoons of butter (divided)
- Optional: marinara sauce, tomato soup, or ranch dressing for dipping
Start by trimming the crusts off each slice of bread. This step can seem tedious, but it gives your roll ups a better texture and appearance. Plus, who doesn’t love a perfectly smooth bite? Once the crusts are removed, you’re ready for the next step!
Roll out the bread and add cheese
Using a rolling pin, gently roll out each slice of bread until they are about ⅛-inch thick. This makes the bread pliable and easy to roll without tearing. Now comes the cheesy part! Sprinkle about 2 tablespoons of shredded cheese onto each rolled slice. Feel free to mix cheeses if you want to experiment with flavors! After sprinkling the cheese, carefully roll each slice tightly. Try to keep the filling well-contained for optimal melty goodness when cooked.
Prepare the cooking pan
In a large non-stick sauté pan, melt 2 tablespoons of butter over medium heat. This will be the base for that golden, crispy exterior you crave. It’s essential to let the butter melt completely; this will keep your grilled cheese roll ups from sticking and ensure even cooking.
Cooking the roll ups to perfection
Melt the remaining 4 tablespoons of butter in a shallow bowl in the microwave – this will make dipping easier. One by one, dip each cheese-filled roll up into the melted butter, allowing any excess to drip off before transferring them to the sauté pan. Cook for about 1-2 minutes on each side until they're golden brown and crisp. Keep an eye on them; the aroma will be irresistible, and you won't want to let them burn!
Make the dipping sauce (optional)
While your roll ups are sizzling away, consider whipping up a quick dipping sauce. Marinara or a light tomato soup complements the cheesy goodness beautifully, while ranch dressing provides a fun twist for dipping. Simply pour your chosen sauce into a bowl, and you’re ready to go!
Once all the roll ups are cooked, serve them warm on a platter and watch them disappear. These little delights are perfect for parties, lunchboxes, or a cozy night in with a favorite movie. Enjoy every gooey bite!
Variations on Grilled Cheese Roll Ups
If you're looking to elevate your grilled cheese roll ups, consider a few delicious variations that will impress your palate.
Adding Turkey Bacon for a Twist
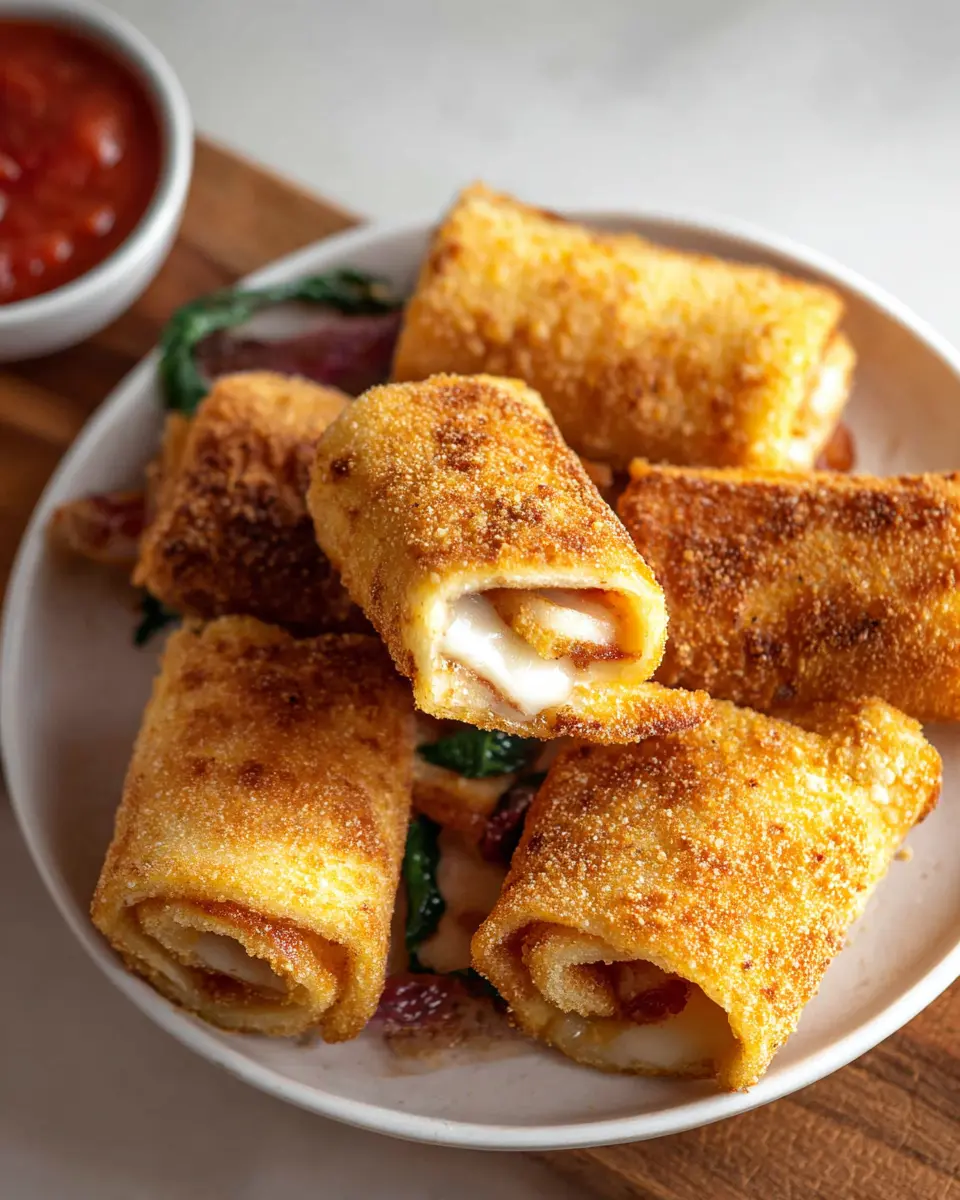
Swap out traditional bacon for crispy turkey bacon for a delightful crunch and a hint of smokiness. Not only does it add flavor, but it's also a leaner option that complements the cheesy goodness perfectly. Just cook the turkey bacon until crispy, chop it into small pieces, and sprinkle it inside your roll ups before the cheese. Your taste buds will thank you!
Incorporating Flavors with Chicken Ham
For an extra layer of flavor, try incorporating chicken ham into your grilled cheese roll ups. This savory addition pairs beautifully with the melted cheese, and it's a great way to add protein without overwhelming the dish. Simply layer a slice or two inside the roll before adding the cheese and rolling it up for a delightful twist.
Experimenting with these variations will keep your meals exciting and satisfying. If you're eager for more inspiration, check out ideas on The Kitchn for additional cheesey goodness!
Cooking Tips and Notes for Grilled Cheese Roll Ups
Ensuring a crispy exterior
To achieve a perfectly crispy exterior for your grilled cheese roll ups, ensure your butter is well-melted and evenly coats each roll before frying. Using a non-stick pan helps, but you can also consider a cast-iron skillet for superior heat retention. Additionally, don’t overcrowd the pan; giving each roll its space allows for better air circulation, leading to that golden, crispy finish.
Cheese melting tips for maximum gooeyness
For maximum gooeyness, opt for freshly shredded cheese instead of pre-packaged options, as the latter often contains anti-caking agents. Combining different cheeses, such as cheddar and mozzarella, can tantalize your taste buds, too! Keep the heat medium-low to allow the cheese time to melt thoroughly without burning the exterior. Want to take it a step further? Place a lid on the pan for a minute to trap steam; it works wonders for that melty goodness!
For more tips on cheese selection, check out Serious Eats to discover the best choices for your grilled cheese creations.
Serving Suggestions for Grilled Cheese Roll Ups
Perfect Pairings for Dipping
When it comes to grilled cheese roll ups, the right dip can elevate your experience. Consider classic options like marinara sauce or creamy tomato soup for that comforting vibe. If you’re feeling adventurous, ranch dressing offers a zesty twist that pairs beautifully with the cheesy goodness. For more ideas on dipping sauces, check out this savory dipping sauce guide.
Ideal Sides to Complement Your Meal
To round out your meal, think about serving these delightful roll ups alongside some fresh sides. A simple side salad with mixed greens can provide a refreshing crunch, while crispy sweet potato fries add a delightful contrast to the warm cheese. If you're in the mood for something hearty, consider a bowl of chili or a light pasta dish. These options not only complement your grilled cheese roll ups but also make for a wonderfully satisfying meal!
Time Breakdown for Grilled Cheese Roll Ups
Preparation Time
Getting started is a breeze! It takes just 15 minutes to gather your ingredients and prepare the ingredients for your grilled cheese roll ups. This easy prep time allows you to dive into cooking without any hassle.
Cooking Time
Once you're ready to roll, the cooking time is quick, clocking in at 5 minutes. That’s right—just 5 minutes to beautifully crisp and golden roll ups, making this an ideal choice for a quick meal or snack.
Total Time
In just 20 minutes, you can enjoy a delicious plate of grilled cheese roll ups that are perfect for any occasion. Whether it's an afternoon snack or a fun dinner, it’s a recipe that fits seamlessly into your busy schedule.
Looking for more quick recipes? Check out this guide for easy snacks that you can whip up in no time!
Nutritional Facts for Grilled Cheese Roll Ups
When you're whipping up grilled cheese roll ups, knowing the nutritional content can help make your snack both delicious and balanced. Here’s a quick rundown on some key figures:
Calories
Each serving of these cheesy delights comes in at approximately 250 calories, making them a satisfying yet manageable treat for any occasion.
Protein
With about 10 grams of protein per serving, these roll ups can help fuel your day, especially if you're looking for a quick bite post-workout.
Sodium
Keep in mind that these roll ups contain around 500 mg of sodium, so if you're watching your salt intake, pair them with fresh veggies or a lighter dipping sauce like homemade salsa.
For more insights on nutrition, check out resources like the USDA Food Data Central or Healthline.
FAQs about Grilled Cheese Roll Ups
Can I make these roll ups in advance?
Absolutely! Grilled cheese roll ups can be prepared ahead of time, making them perfect for busy weeknights or gatherings. Simply roll them up, store them in an airtight container in the fridge, and then pan-fry them when you’re ready to enjoy. Note that the texture may vary slightly when reheating, but they’ll still taste delicious!
What’s the best cheese for grilling?
For ultimate gooeyness, cheddar is often the go-to choice. However, feel free to experiment with cheeses like mozzarella, provolone, or a blend of your favorites. According to culinary experts, cheeses with good melting properties will elevate your grilled cheese roll ups to new heights.
How can I add vegetables to my roll ups?
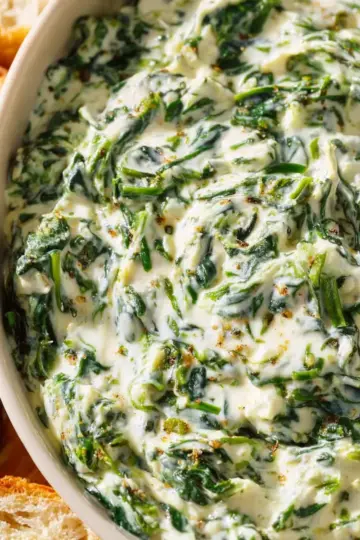
Incorporating veggies is a fantastic way to enhance flavors and nutrition. Consider adding sautéed spinach, bell peppers, or even roasted tomatoes. Just be sure to chop them finely and sauté to reduce moisture. Your taste buds will thank you for the added crunch and color!
For more tips on making the perfect roll ups, check out this resource for expert advice and creative ideas.
Conclusion on Grilled Cheese Roll Ups
Grilled cheese roll ups are not just a fun twist on a classic; they’re a delightful, shareable snack perfect for any occasion. Whether served with marinara sauce, tomato soup, or ranch, they bring smiles and warmth to the table. Elevate your next gathering with these tasty bites!

Grilled Cheese Roll Ups
Equipment
- rolling pin
- non-stick saute pan
- Shallow bowl
Ingredients
Bread and Cheese
- 8 slices soft white bread
- 1 cup shredded cheddar cheese
- 6 tablespoons butter divided
Dipping Sauce
- marinara sauce
- tomato soup
- ranch dressing
Instructions
Preparation
- Trim the crusts from each slice of bread. Roll one slice out to about ⅛-inch thickness with a rolling pin. Sprinkle the rolled out slice with about 2 tablespoons shredded cheese. Roll up tightly. Repeat with remaining bread slices and shredded cheese.
- Place 2 tablespoons butter in a large non-stick saute pan and melt over medium heat.
- Melt remaining 4 tablespoons butter in a shallow bowl in the microwave. Dip one roll up at a time in the melted butter in the shallow bowl and then transfer to the saute pan. Allow roll ups to saute for 1-2 minutes per side until golden brown and buttery crisp on the outside. Remove to a serving platter.
- Serve with tomato sauce, tomato soup or ranch dressing for dipping, if desired.


Leave a Reply