
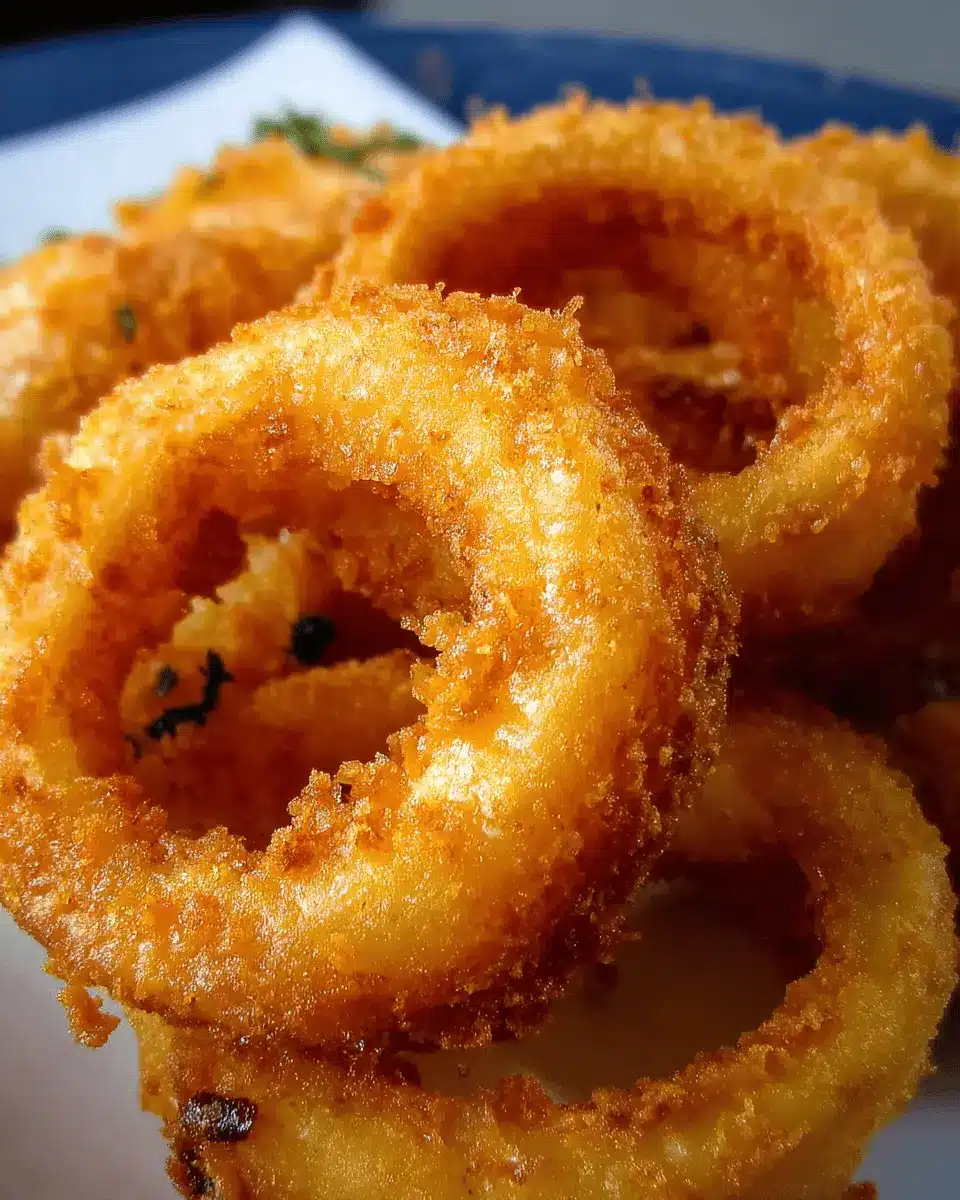
Introduction to Old-Fashioned Onion Rings
It’s amazing how something as simple as old-fashioned onion rings can elevate your dining experience at home. For young professionals juggling tight schedules and busy lives, making these crispy delights from scratch is a game changer. Instead of settling for takeout or compromising on flavor with frozen alternatives, why not whip up a batch of onion rings that rival your favorite diner’s recipe?
Homemade onion rings are not only a nostalgic treat but also a fantastic way to impress friends during casual get-togethers or weekend movie nights. Imagine the aroma of sweet Vidalia onions frying to golden perfection filling your kitchen. You can customize them with various dips or spices, tailoring the experience to your taste buds.
Instead of navigating through crowded takeout places, these old-fashioned onion rings provide a delicious and fulfilling break in your week, all while you hone your culinary skills. Plus, with only 30 minutes of prep and cook time, they’re perfect for after-work cooking without added stress. Dive into this recipe, and discover how a handful of ingredients can create something incredibly satisfying and homemade!
For more delicious and easy recipes, check out resources like Bon Appétit or Food Network that inspire your inner chef.
Ingredients for Old-Fashioned Onion Rings
Key ingredients you’ll need for the best onion rings
To whip up the ultimate old-fashioned onion rings, start with the essentials that create that classic, crunchy texture:
- 1 large Vidalia or sweet onion: These onions provide the perfect balance of sweetness and bite.
- 1 quart oil for frying: Canola or peanut oil works wonders for frying, giving that crispy finish we all love.
- 1 ¼ cups all-purpose flour: For that golden coating that seals in the juicy onion.
- 1 teaspoon baking powder: This gives the batter a light and airy texture.
- 1 teaspoon salt: A must-have for flavor enhancement.
- 1 cup milk: Adjust as needed for the perfect batter consistency.
- 1 large egg: Helps bind the ingredients together.
- ¾ cup dry bread crumbs: For that extra crunch.
- ⅛ teaspoon seasoned salt: Adds a flavorful kick!
Optional ingredients for added flavor
Want to elevate your old-fashioned onion rings even further? Here are some great options to consider:
- Spices like paprika or cayenne pepper: Sprinkle these into your flour mixture for a subtle heat.
- Garlic powder or onion powder: Add to the batter for enhanced savoriness.
- Fresh herbs, such as parsley or chives: These can add a refreshing touch when sprinkled on top after frying.
Experimenting with these ingredients will make your old-fashioned onion rings uniquely yours! Looking for more tips? Check out CulinarySchool.com for genius frying techniques!
Step-by-step Preparation of Old-Fashioned Onion Rings
Crafting old-fashioned onion rings at home is not just a cooking task; it's a culinary adventure filled with savor and crunch. Let’s roll up our sleeves and follow these simple yet essential steps to achieve that perfect golden-brown treat!
Gather your ingredients and tools
Before diving into the cooking process, it's crucial to have everything at your fingertips. Here’s what you’ll need:
-
Ingredients:
-
1 large Vidalia or other sweet onion
-
1 quart of oil for frying
-
1 ¼ cups of all-purpose flour
-
1 teaspoon baking powder
-
1 teaspoon salt
-
1 cup milk, or as needed
-
1 large egg
-
¾ cup dry bread crumbs
-
⅛ teaspoon seasoned salt, or to taste
-
Tools:
-
Sharp knife
-
Deep-fryer or heavy pot
-
Wire rack
-
Shallow dishes for breading
-
Cooking thermometer (optional, but useful)
Slice the onion rings to perfection
Careful slicing is key to achieving that ideal onion ring texture. Start by peeling your onion and cutting it into ¼-inch-thick rings. You want them thick enough to hold their shape but not so thick that they take forever to cook!
For an enjoyable guide on slicing onions, check out this culinary technique resource for tips and tricks.
Preheat the oil and set up your breading station
Heat your oil in a deep-fryer to 365 degrees F (185 degrees C). While that’s warming up, create your breading station with three shallow dishes:
- Mix flour, baking powder, and salt in the first dish.
- Whisk milk and egg together in the second dish.
- Add the dry bread crumbs to the third dish.
These stations will streamline the breading process and make it a breeze.
Dredge, dip, and coat your onion rings
Now it’s time for the fun part! Begin by taking an onion ring, dipping it into the flour mixture. Make sure it’s thoroughly coated to help the egg mix stick later.
Next, transfer the coated ring to the egg mixture, tossing it gently with a fork to allow any excess to drip off. Finally, coat the ring in the bread crumbs, ensuring a generous layer. This is what will give your old-fashioned onion rings that crunchy exterior.
Fry the onion rings until golden brown
With your oil nicely heated, carefully drop 3 to 4 onion rings into the oil at a time. Fry them for about 2 to 3 minutes or until they turn a beautiful golden brown. It’s thrilling to watch them puff up—just don’t overcrowd the fryer!
Drain and season for the final touch
Once your onion rings are perfectly fried, use a slotted spoon to transfer them onto a wire rack covered with paper towels. This step is vital as it helps absorb any excess oil. While they’re still hot, sprinkle them with seasoned salt to elevate their flavor game.
Serve these delightful old-fashioned onion rings with your favorite dipping sauce or just enjoy them as they are! You’ll find that homemade onion rings bring a nostalgic charm that’s hard to resist. Happy frying!
Variations on Old-Fashioned Onion Rings
Spicy Onion Rings with a Kick
Elevate your classic old-fashioned onion rings by adding some heat! Mix cayenne pepper or paprika into your flour mixture for a delightful surprise. For an extra flavor punch, consider tossing your fried rings with a blend of chili powder and sea salt. Not only will these spicy onion rings tantalize your taste buds, but they’ll also impress anyone enthusiastic about a flavorful appetizer.
Beer-Battered Onion Rings for a Fun Twist
Looking to add a unique twist to your old-fashioned onion rings? Try using a beer batter! Substitute half the milk in your batter with your favorite beer; the carbonation creates a light and airy texture that’s hard to resist. Crispier and more delicious, these beer-battered rings pair perfectly with a dipping sauce, such as a tangy sriracha mayo or a classic ranch.
For more creative onion ring recipes, check out sources like Bon Appétit or Serious Eats. Experimentation is where the fun begins, so let your creativity shine!
Cooking Tips and Notes for Old-Fashioned Onion Rings
Tips for Achieving the Perfect Crispy Texture
To get that wonderfully crispy texture everyone loves in old-fashioned onion rings, ensure your oil is hot enough (around 365°F). A temperature check with a kitchen thermometer can go a long way. Also, don't skip the double-dipping! Coating the rings in flour, then egg, and finally breadcrumbs ensures a thicker, crunchier crust. For extra crunch, consider adding a pinch of cornstarch to the flour mixture.
Common Mistakes to Avoid When Frying
One common pitfall is overcrowding the frying basket. Frying too many rings at once can lower the oil temperature, resulting in soggy rings. Instead, fry in small batches. Additionally, make sure to drain the cooked onion rings on paper towels to remove excess oil. This final step helps maintain their crispiness, making your old-fashioned onion rings the star of your home-cooked meal!
Serving Suggestions for Old-Fashioned Onion Rings
Best Dipping Sauces to Pair with Onion Rings
Nothing elevates your old-fashioned onion rings quite like a delicious dipping sauce. Some crowd-pleasers include:
- Classic Ketchup: A timeless choice that balances the savory crunch.
- Creamy Ranch Dressing: Perfect for those who enjoy a tangy contrast.
- Spicy Aioli: A zesty twist that adds an exciting kick.
- BBQ Sauce: The sweet and smoky flavors pair beautifully with the crispy batter.
Each option adds a unique flair, allowing you to customize your dining experience based on your mood!
Creative Ways to Serve Onion Rings as a Side
Why limit your old-fashioned onion rings to just appetizers? Here are some fun ideas to integrate them into your meals:
- Burger Sidekick: Serve alongside your favorite burger for a nostalgic diner experience.
- Salad Crunch: Toss them into a fresh salad for added texture.
- Loaded Nachos: Layer onion rings atop nachos for twist on classic game day snacks.
These suggestions not only enhance your meal but also make for great conversation starters at your next gathering! For more ideas, check out Serious Eats for additional sides that complement your fried delights.
Time Breakdown for Old-Fashioned Onion Rings
Preparation Time
Getting those delicious old-fashioned onion rings ready takes about 15 minutes. This includes gathering your ingredients and slicing the onions. Make sure your workspace is organized for the best efficiency!
Cooking Time
The cooking itself is quick and satisfying, taking around 15 minutes. You'll love watching the onion rings transform into crispy, golden perfection right before your eyes!
Total Time
In just 30 minutes, you can indulge in these fantastic old-fashioned onion rings. They’re perfect for a snack, party appetizer, or a fun side dish. Enjoy the crunch and nostalgia of homemade goodness!
For more tips on frying techniques and recipes, visit Serious Eats to expand your cooking repertoire!
Nutritional Facts for Old-Fashioned Onion Rings
Calories and fat content
These delightful old-fashioned onion rings pack a satisfying punch, coming in at approximately 641 calories per serving. Out of these, 35 grams of fat contribute to their crispy, indulgent texture, allowing you to enjoy an authentic treat from the comfort of your home.
Protein and carbohydrate breakdown
Each serving offers a hearty 14 grams of protein, balancing out the crunch with some staying power. You'll also find 68 grams of carbohydrates, making these onion rings a tasty choice for a satisfying snack or side dish. For added perspective, toppings or sides like a fresh salad can beautifully complement their flavor while enhancing the nutritional profile. If you’re curious about more nutritional insights, consider checking resources like the USDA FoodData Central for detailed nutrient breakdowns.
Whether you're planning a casual gathering or simply craving comfort food, these old-fashioned onion rings can help create memorable culinary experiences!
FAQ about Old-Fashioned Onion Rings
Can I make these onion rings gluten-free?
Absolutely! You can easily adapt this old-fashioned onion rings recipe to be gluten-free. Simply substitute the all-purpose flour with a gluten-free blend and ensure your bread crumbs are also gluten-free. Many brands offer excellent alternatives that won't sacrifice flavor or crunchiness.
What’s the best way to store leftover onion rings?
To keep your leftover onion rings crispy, store them in an airtight container at room temperature. Avoid refrigerating them, as they can turn soggy. When ready to eat, just pop them in the oven at 350°F for about 10 minutes to restore their crunch.
Can I prepare onion rings ahead of time?
While it's best to enjoy your old-fashioned onion rings fresh, you can prep them ahead by battering the rings and placing them on a baking sheet. Just cover them tightly with plastic wrap and store them in the fridge. Fry them just before serving for that perfect crispy bite!
For more cooking tips and recipe inspirations, check out Serious Eats or The Kitchn.
Conclusion on Old-Fashioned Onion Rings
Homemade old-fashioned onion rings provide a delightful alternative to fast-food versions. With their perfectly crispy coating and sweet, tender onions, they bring a nostalgic taste to your table. Enjoying them fresh allows you to savor quality ingredients, homemade flavor, and a fun cooking experience that beats any drive-thru meal!
Old-Fashioned Onion Rings
Equipment
- deep fryer
Ingredients
- 1 large Vidalia or other sweet onion
- 1 quart oil for frying or as needed
- 1.25 cups all-purpose flour
- 1 teaspoon baking powder
- 1 teaspoon salt
- 1 cup milk or as needed
- 1 large egg
- 0.75 cups dry bread crumbs
- 0.125 teaspoon seasoned salt or to taste
Instructions
- Gather all ingredients.
- Slice onion into ¼-inch-thick rings. Heat oil in a deep-fryer to 365 degrees F (185 degrees C). Place a wire rack over a sheet of aluminum foil.
- Prepare breading station by setting out 3 wide, shallow dishes. Whisk flour, baking powder, and salt together in the first dish. Whisk milk and egg together in the second dish. Place bread crumbs in the third dish.
- Dip each onion ring into the flour mixture, turning several times until fully coated with flour.
- Transfer to the egg mixture and use a fork to turn until coated. Lift onion with the fork and shake gently so excess liquid drips back into the dish.
- Place onion in the bread crumbs and turn several times to coat, scooping crumbs over the ring if necessary.
- Lift again with the fork, tap any excess bread crumbs back into the dish, and place on the wire rack while you prepare the remaining onion rings.
- Deep-fry 3 to 4 onion rings at a time in the preheated oil until golden brown, 2 to 3 minutes. Drain on paper towels while you deep-fry the remaining rings.
- Sprinkle with seasoning salt before serving.
Leave a Reply